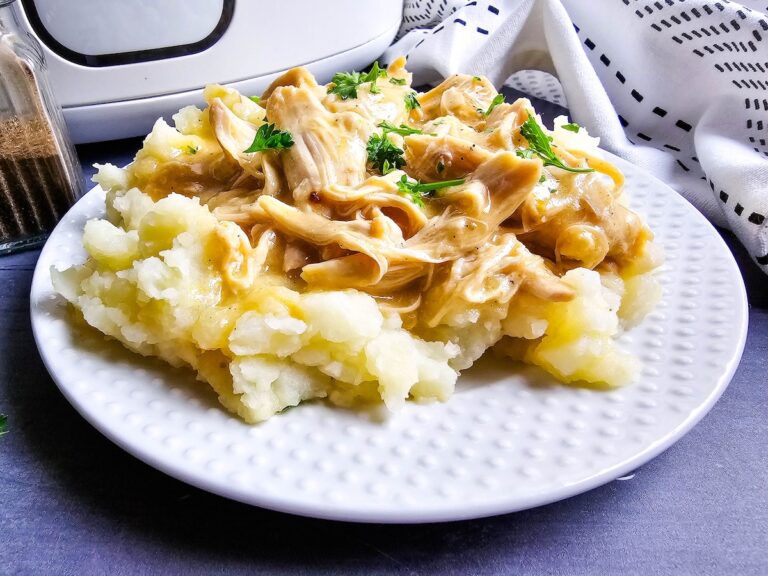
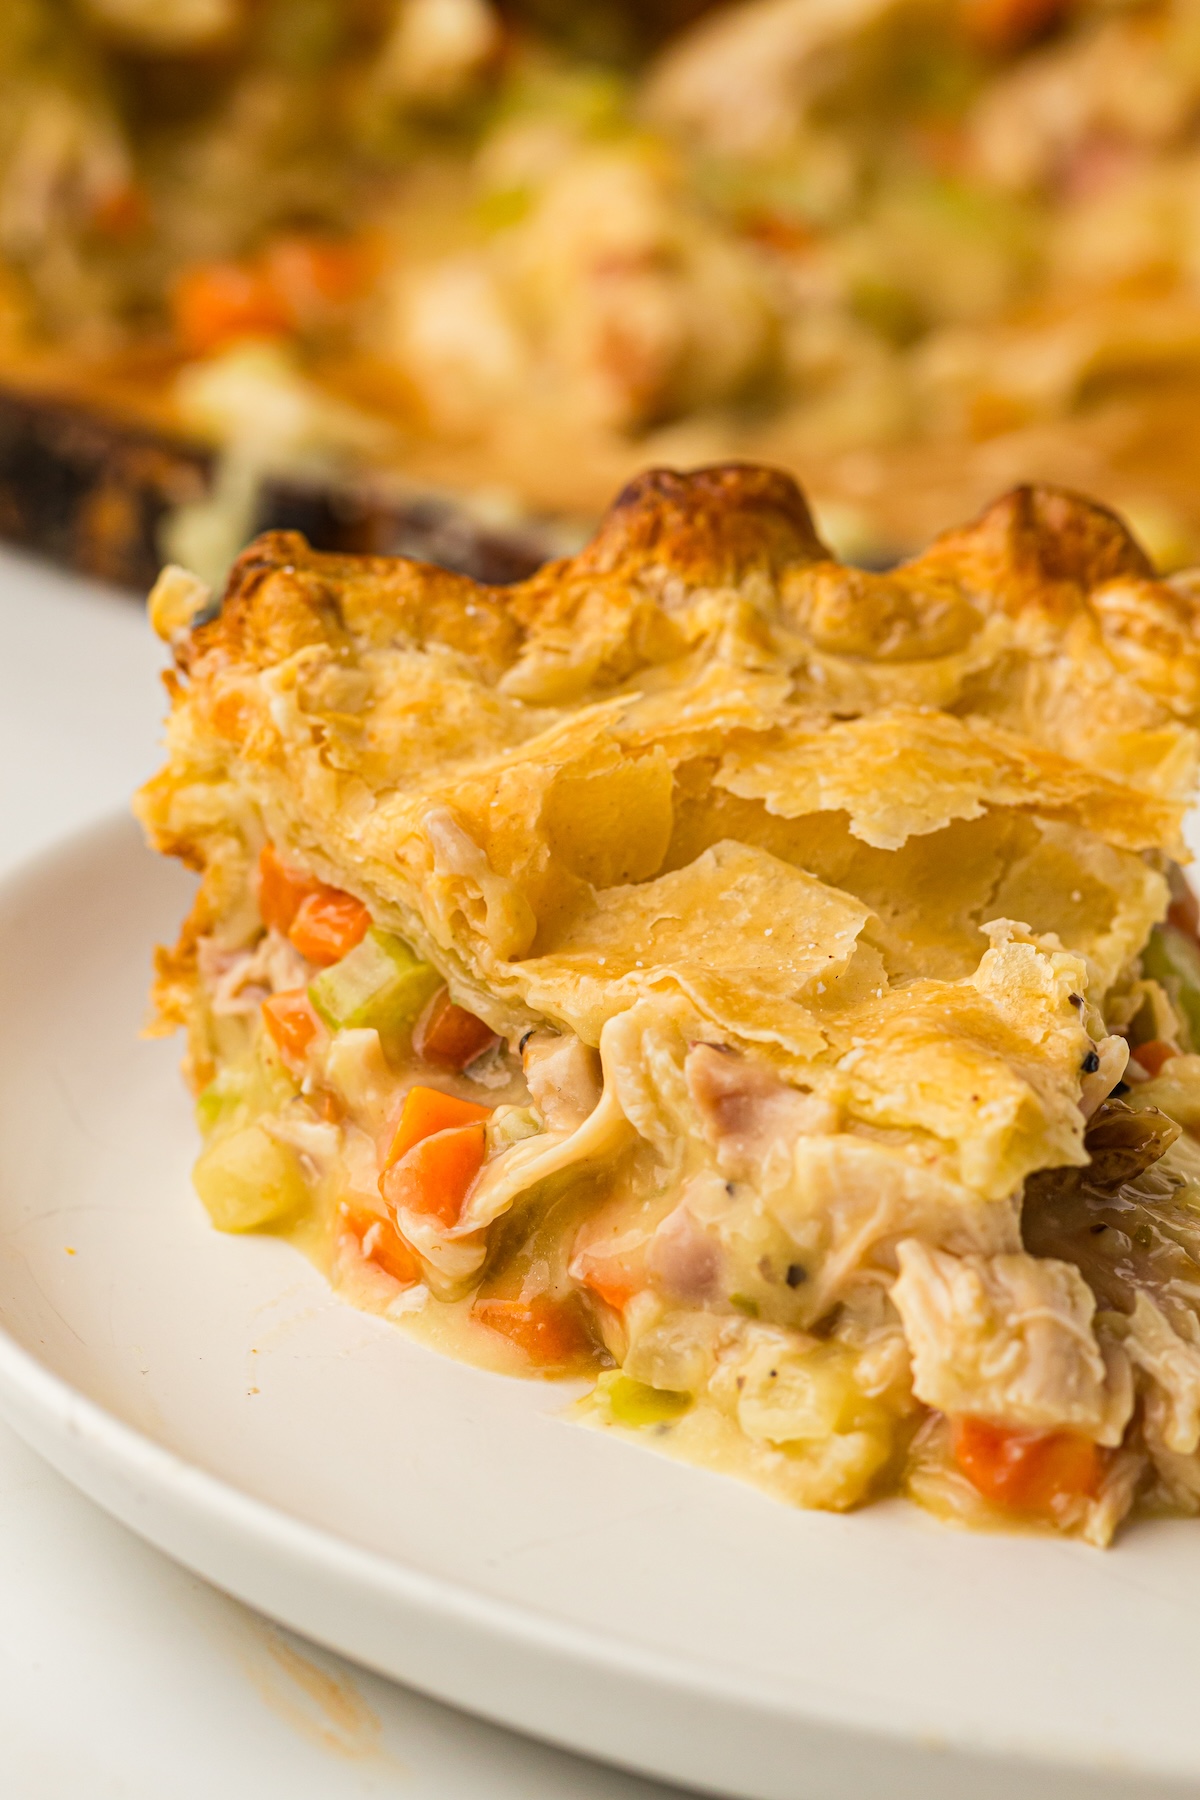
There is something undeniably magical about pulling a golden, bubbling chicken pot pie out of the oven. The smell of buttery pastry mingling with savory herbs and rich gravy instantly makes any kitchen feel like a warm haven. When the weather gets chilly or you just need a meal that feels like a comforting hug, this classic dish always answers the call.

We all have those evenings where dinner feels like a puzzle we do not have the energy to solve. You want something hearty and homemade, but you do not want to spend three hours standing over a hot stove. That is exactly where this fantastic recipe comes in. It strikes the perfect balance between deeply satisfying, made-from-scratch flavor and realistic, weeknight-friendly preparation.
Let us dive right into how you can bring this versatile, crowd-pleasing dinner to your table tonight. We will walk through everything you need to know, from simple ingredient swaps to clever storage tricks that make leftovers taste just as amazing as the first slice.
Why This Recipe Works Every Time
Making a great pot pie comes down to a few basic principles: a rich filling, tender vegetables, and a perfectly flaky crust. This recipe nails all three without requiring a culinary degree. By utilizing a simple homemade gravy crafted right in the skillet, you capture all the flavors of the sautéd vegetables.
We keep the seasoning straightforward but impactful. A little bit of dried thyme goes a long way in elevating the savory notes of the chicken broth. Meanwhile, using a splash of whole milk adds just the right amount of creaminess without making the filling overly heavy.
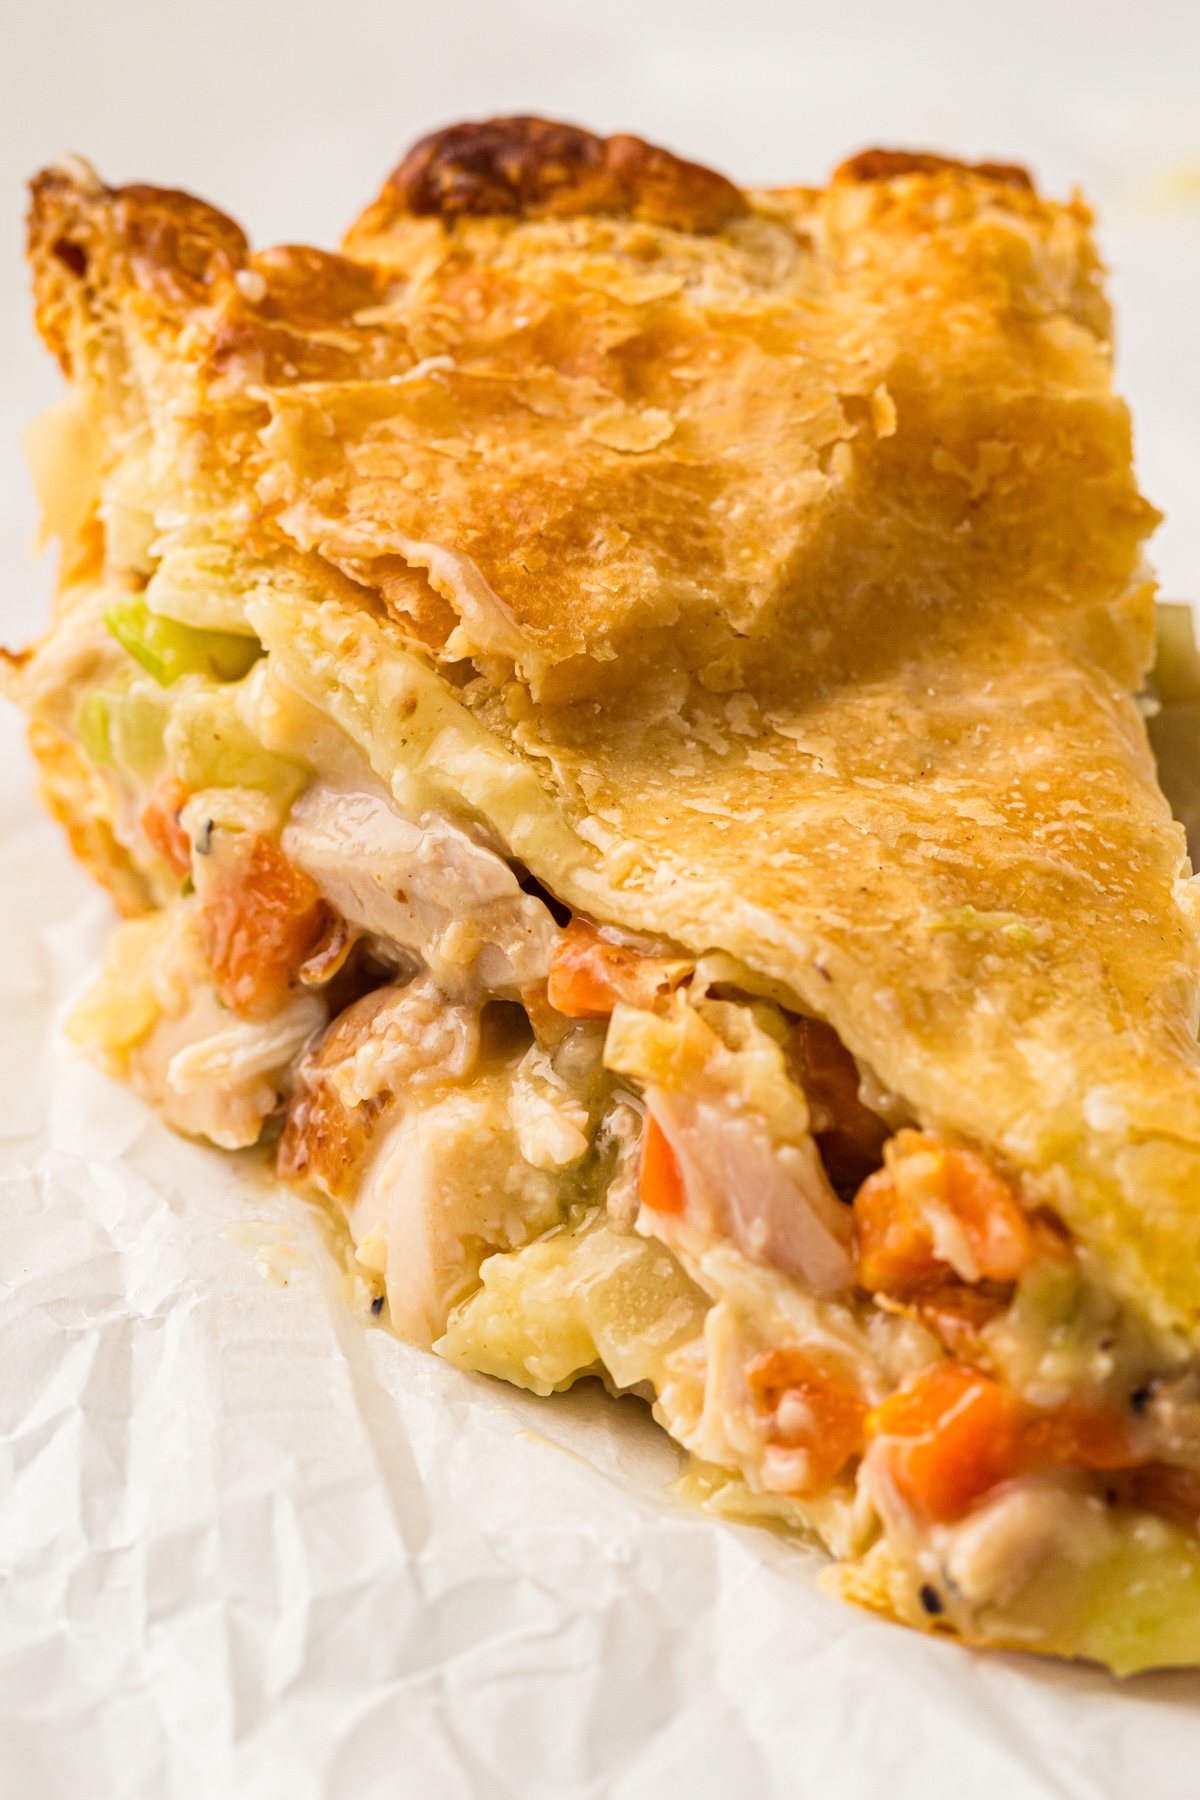
The beauty of this dish lies in its reliability. Whether you are cooking for a family of six or meal-prepping for yourself, this recipe yields consistent, delicious results. You get a thick, hearty filling that holds its shape beautifully once cooled, encased in a gorgeous, flaky pastry shell.
Clever Time-Saving Tips for Busy Evenings
We know you love a fantastic home-cooked meal, but we also know your time is valuable. If you want to shave a few minutes off the prep time, you have some wonderful options.
First, let us talk about the chicken. Do you need to roast a whole bird from scratch? Absolutely not. Using a store-bought rotisserie chicken is one of the smartest kitchen hacks around. It brings incredible, seasoned flavor to your pie and saves you easily thirty minutes of cooking and cooling time. Simply pull the meat from the bone, dice it up, and you are ready to go.
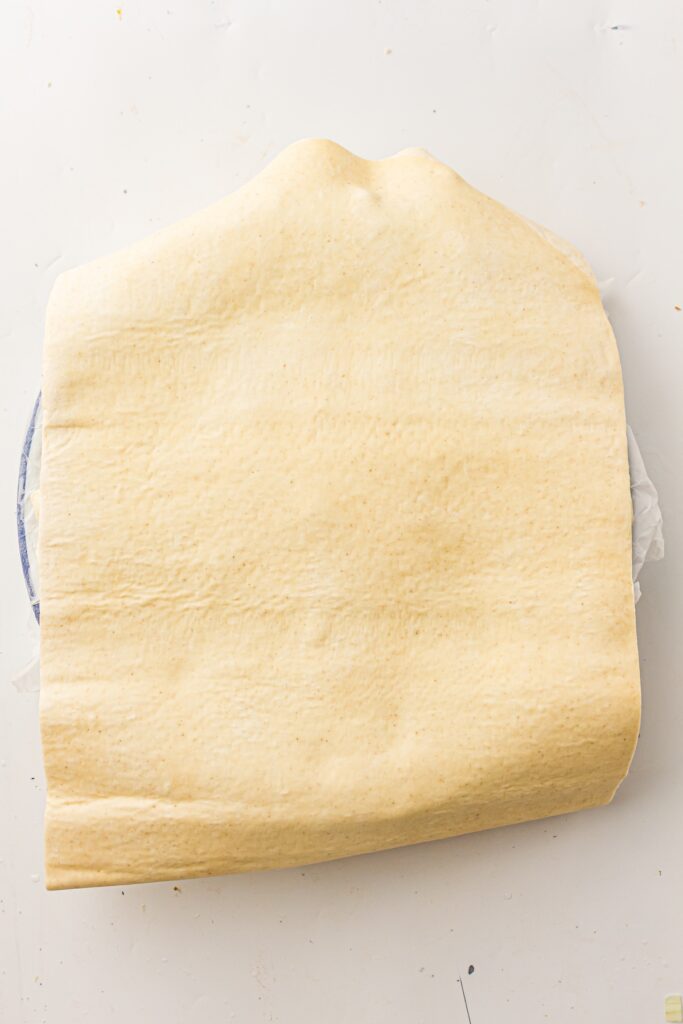
Next, consider your pastry. While making pie dough from scratch is a fun weekend project, refrigerated pie crusts are spectacular lifesavers for weeknight dinners. They bake up beautifully golden and crisp. Just remember to let them sit at room temperature for about fifteen minutes before unrolling so they do not crack.
How to Customize Your Pot Pie
One of the greatest things about chicken pot pie is how eagerly it welcomes variations. You can treat the filling as a blank canvas for whatever you have sitting in your vegetable crisper.
Do you love peas? Toss in a handful of frozen peas right at the end of making your gravy. They do not even need to be thawed first; the heat of the oven will cook them perfectly. You can also mix in some sweet corn, diced green beans, or even some roasted butternut squash cubes if you want an autumnal twist.
If you prefer a richer gravy, you can swap the whole milk for half-and-half or heavy cream. For a deeper flavor profile, try adding a splash of dry white wine to the skillet right after you sauté the vegetables, letting it reduce before you add the flour. Make this recipe your own, and do not be afraid to experiment with your family’s favorite ingredients.
The Ultimate Chicken Pot Pie Recipe
Are you ready to create some kitchen magic? Gather up your ingredients and let us get cooking.
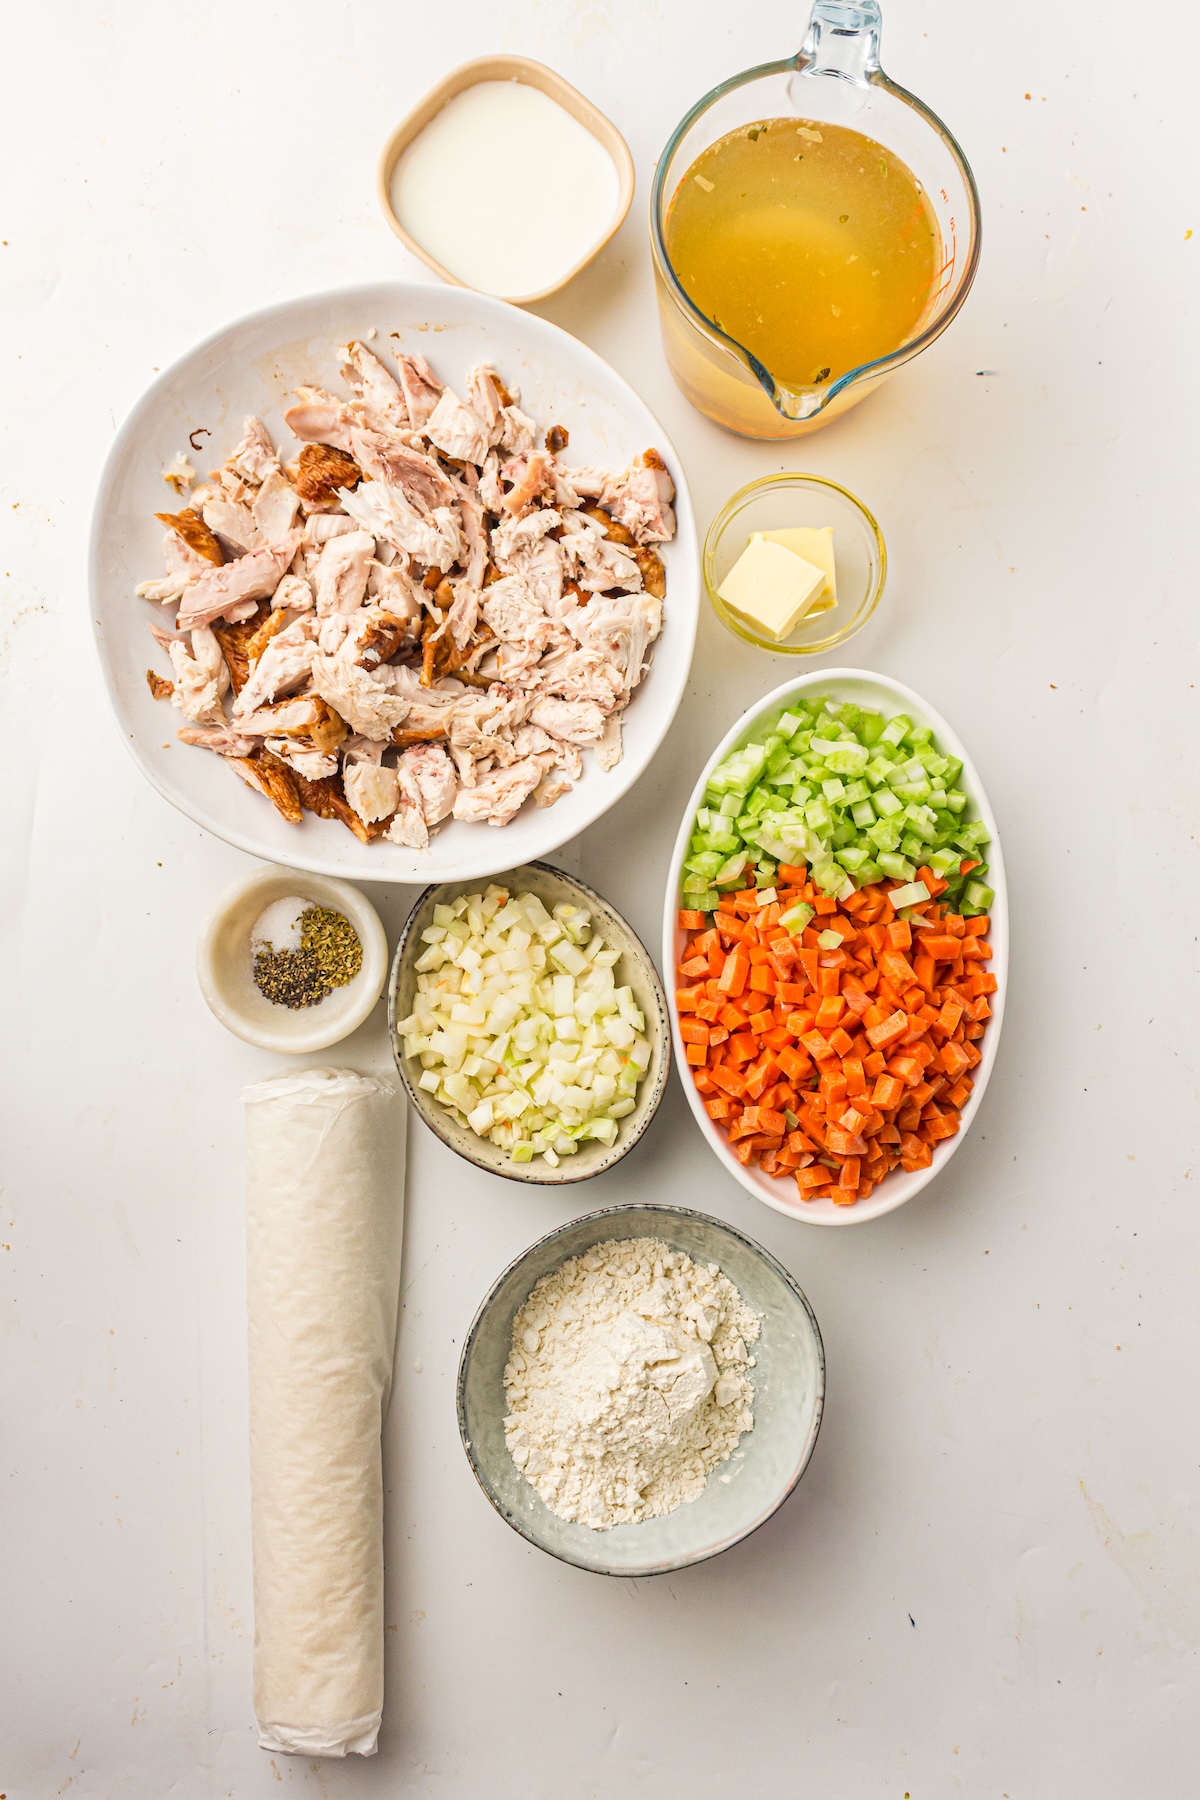
What You Need for the Filling
- 3 cups cooked chicken, diced
- 2 tablespoons butter
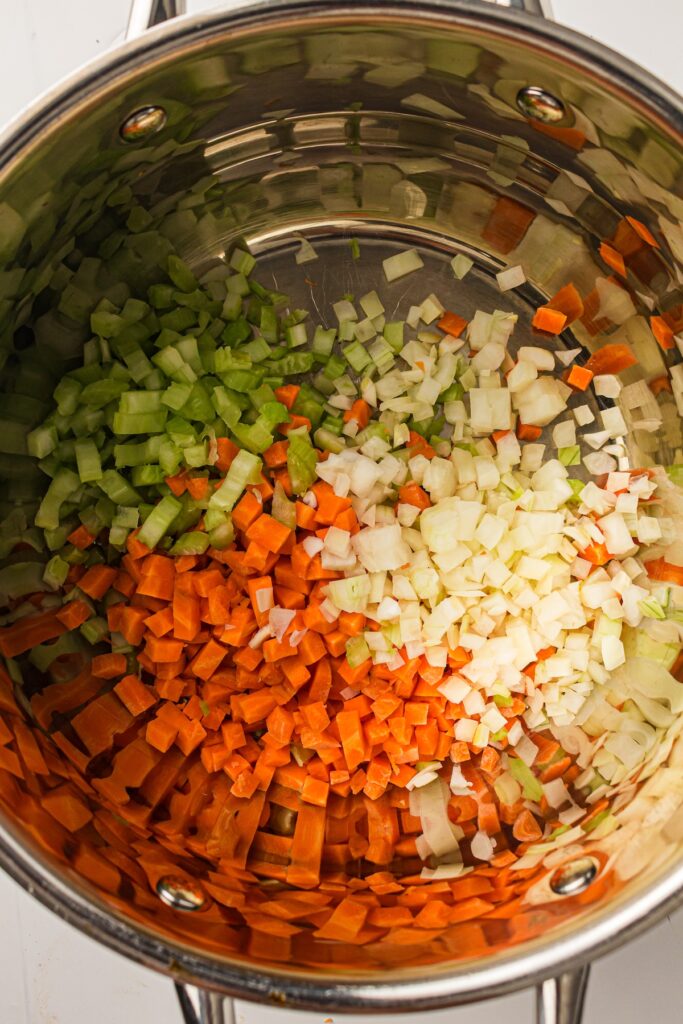
- 1 small onion, diced
- 2 carrots, diced
- 2 celery stalks, diced
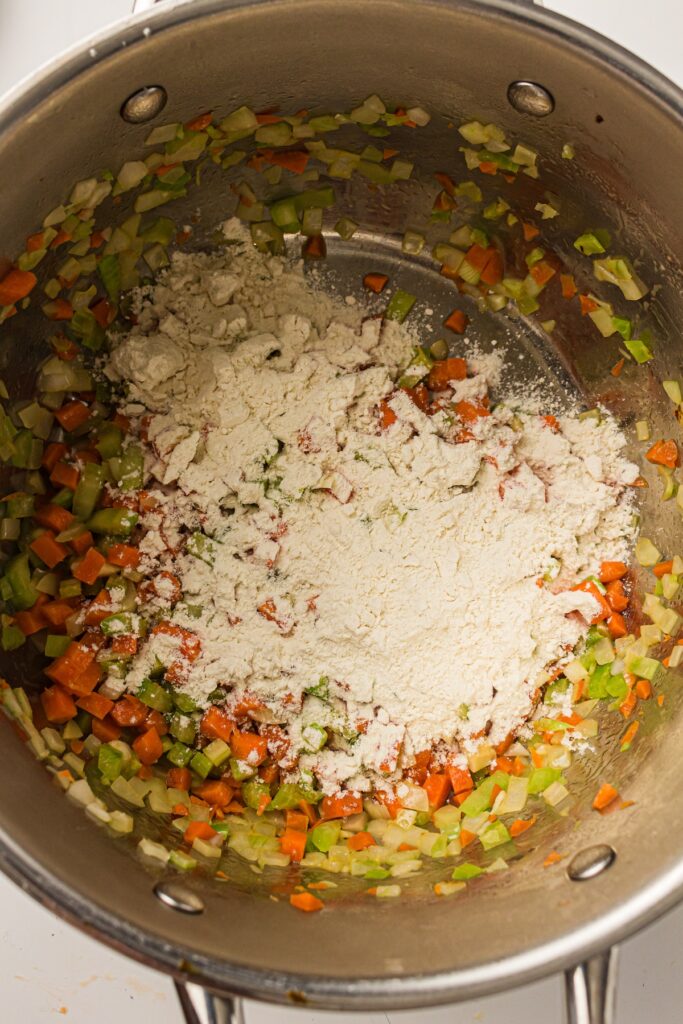
- ⅓ cup all-purpose flour
- 2 cups chicken broth
- ½ cup whole milk
- 1 teaspoon salt
- ½ teaspoon black pepper
- ½ teaspoon dried thyme
What You Need for the Crust
- 2 refrigerated pie crusts
Step-by-Step Instructions
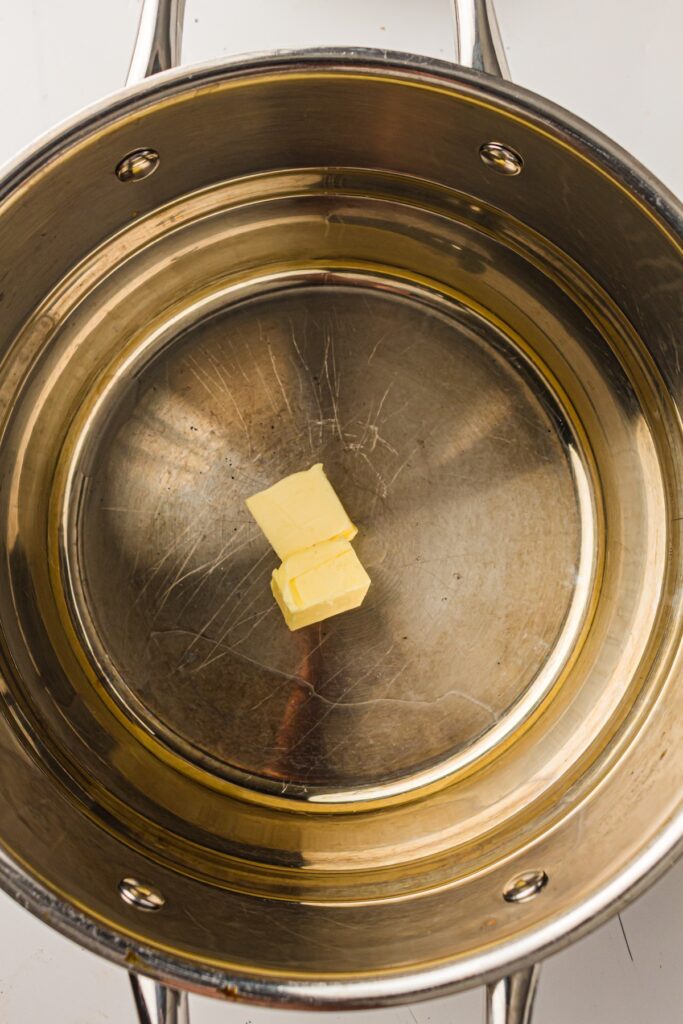
Melt the butter in a large skillet over medium heat. Let it get nice and bubbly.
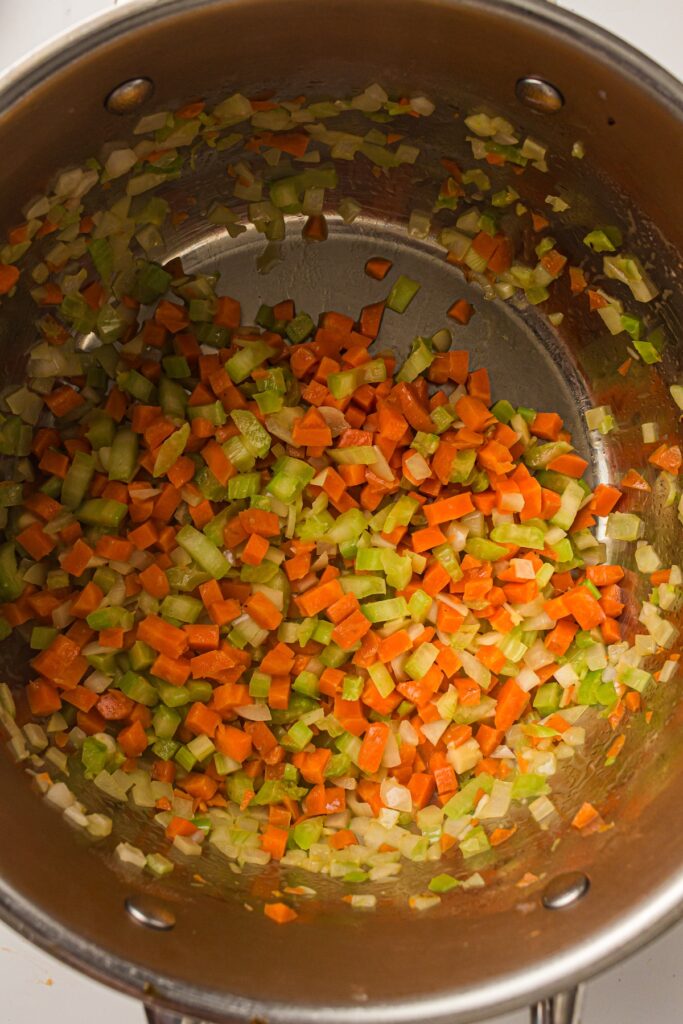
Toss your diced onion, carrots, and celery into the skillet. Sauté them until they are softened and smell incredibly fragrant.
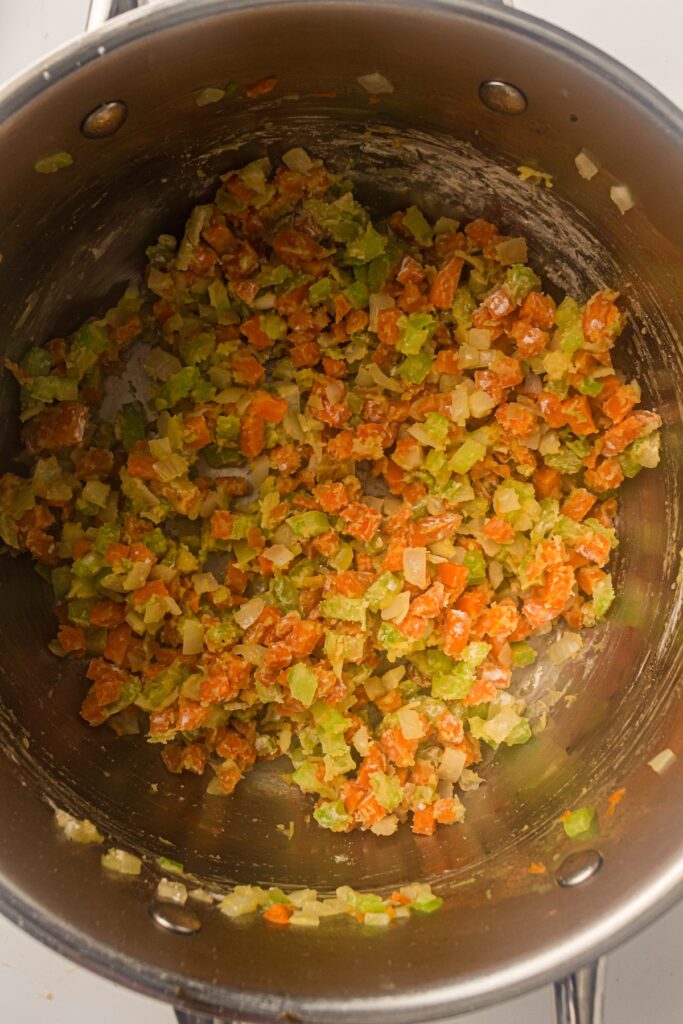
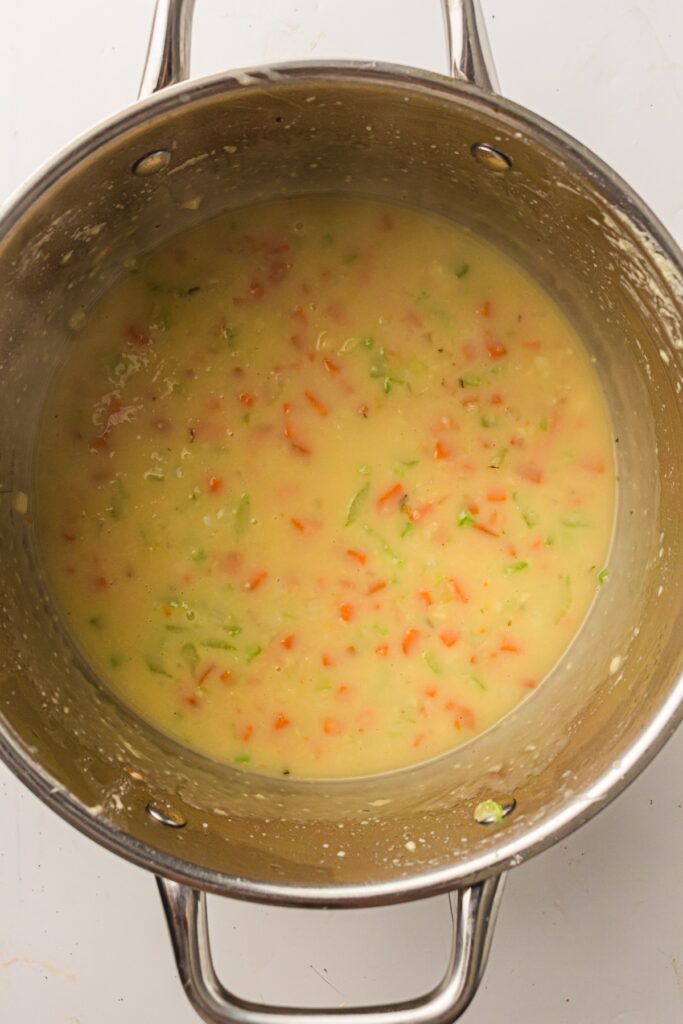
Sprinkle the flour over the softened vegetables. Stir everything constantly and cook for exactly 1 minute. This cooks out the raw flour taste.
Gradually whisk in the chicken broth and milk. Keep whisking until the mixture thickens into a beautiful, smooth gravy.
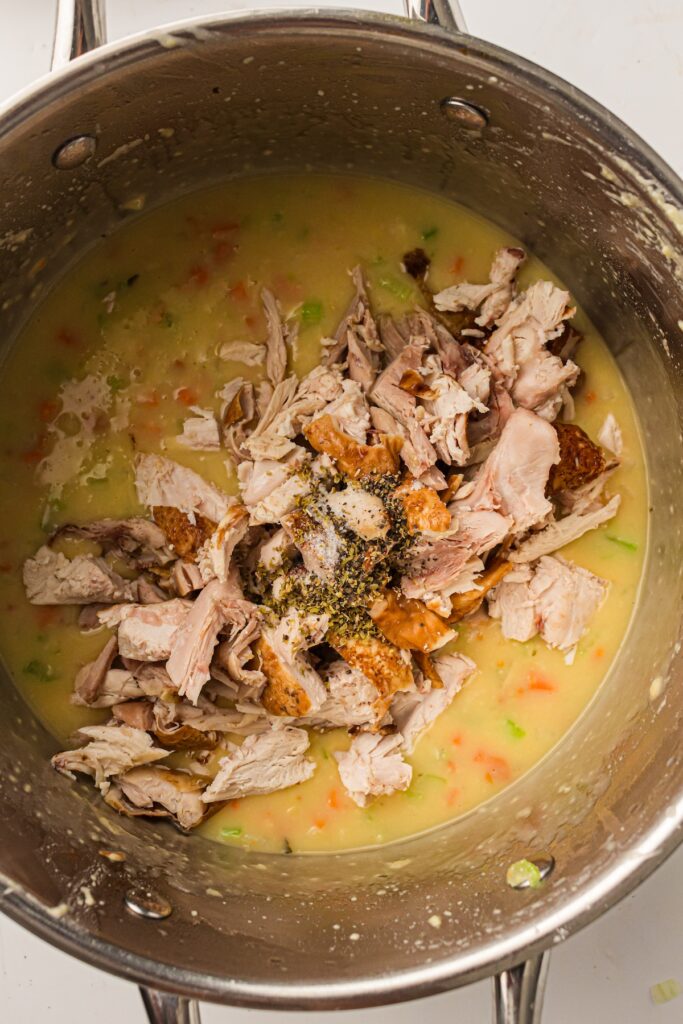
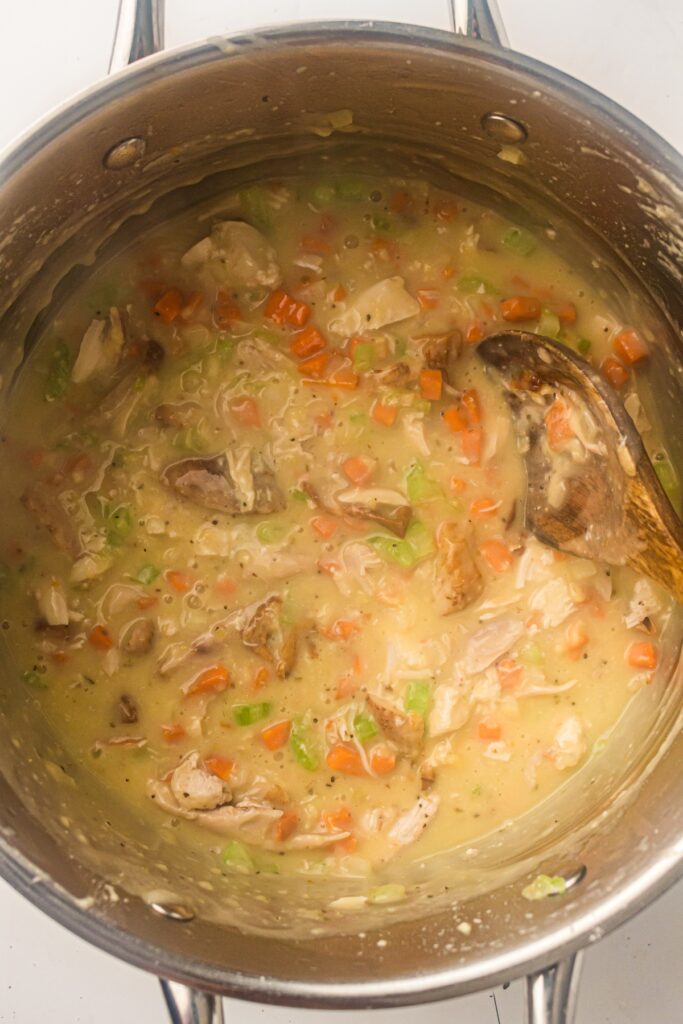
Add your diced cooked chicken, salt, black pepper, and dried thyme to the skillet. Stir gently to combine everything.
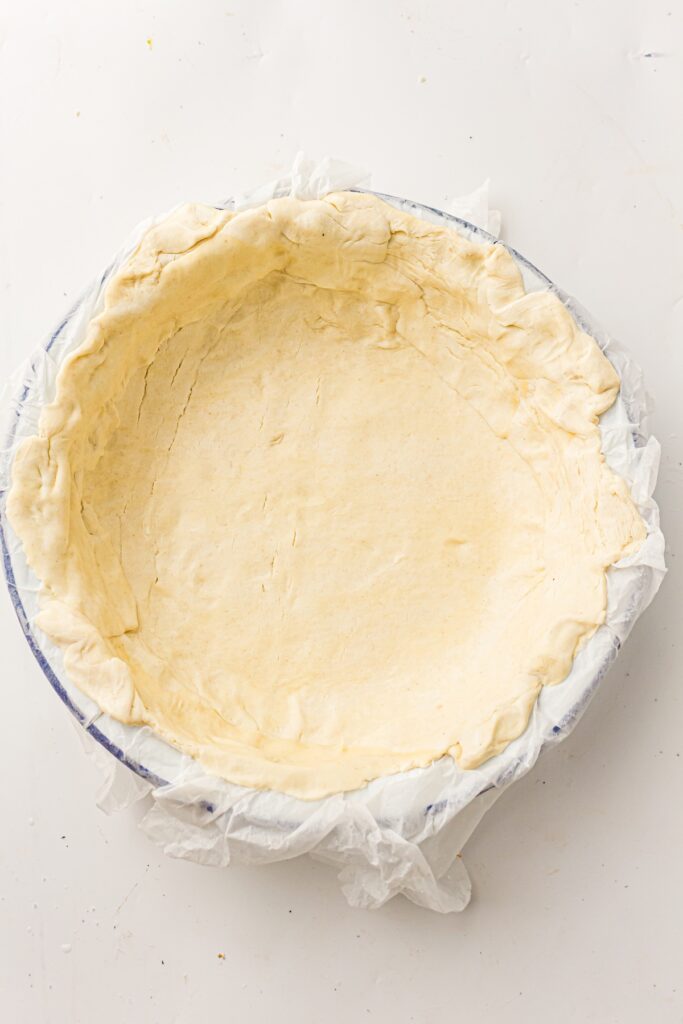

Unroll one of your refrigerated pie crusts and press it gently into the bottom of a standard pie dish. Transfer your warm filling directly into the lined dish.
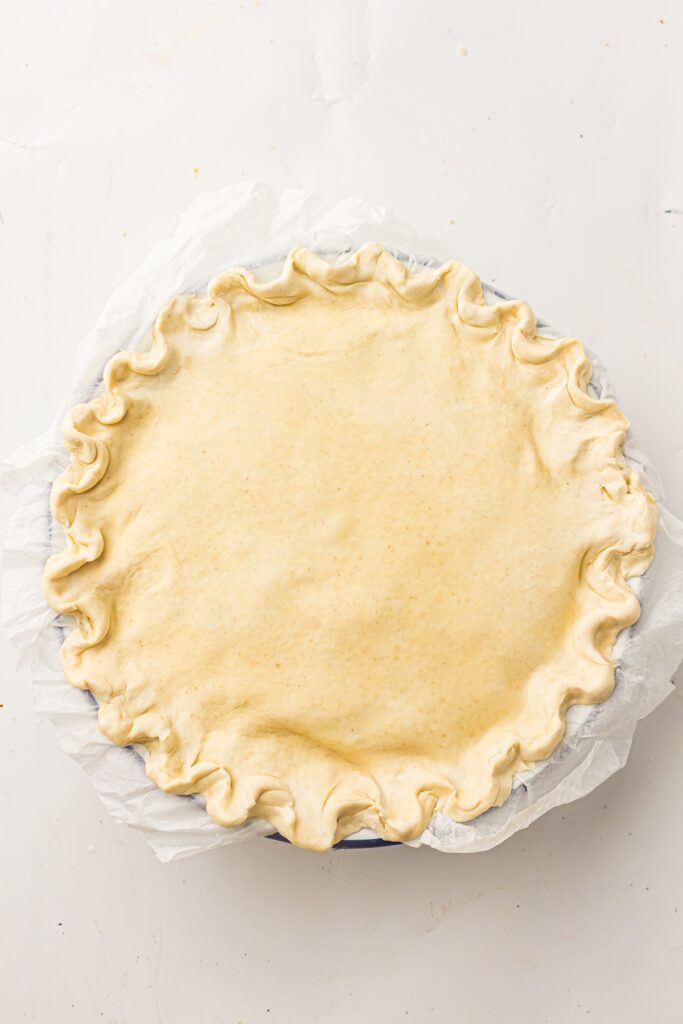
Top the filling with your second unrolled pie crust. Crimp the edges together tightly to seal the pie and keep all that delicious gravy inside.
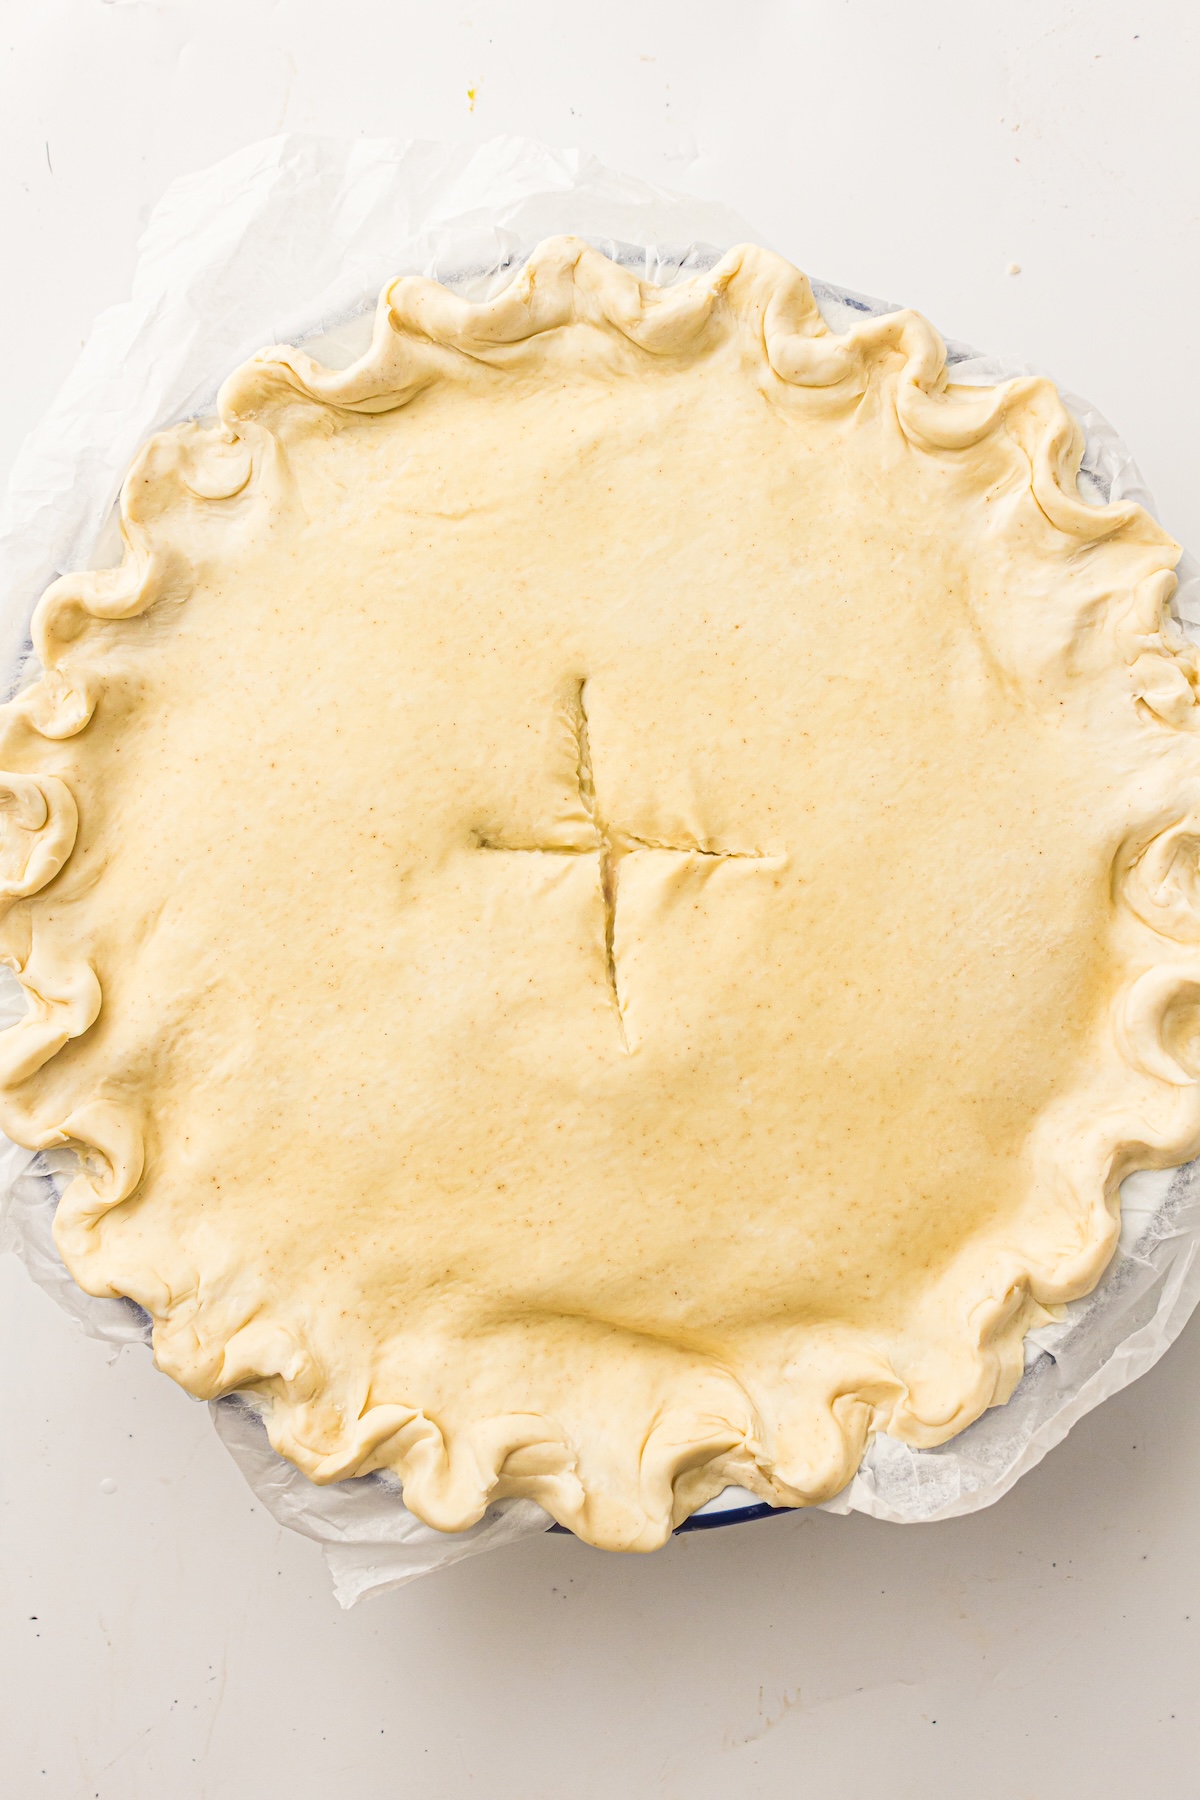
Use a sharp knife to cut a few small vents in the center of the top crust. This lets the steam escape while baking.
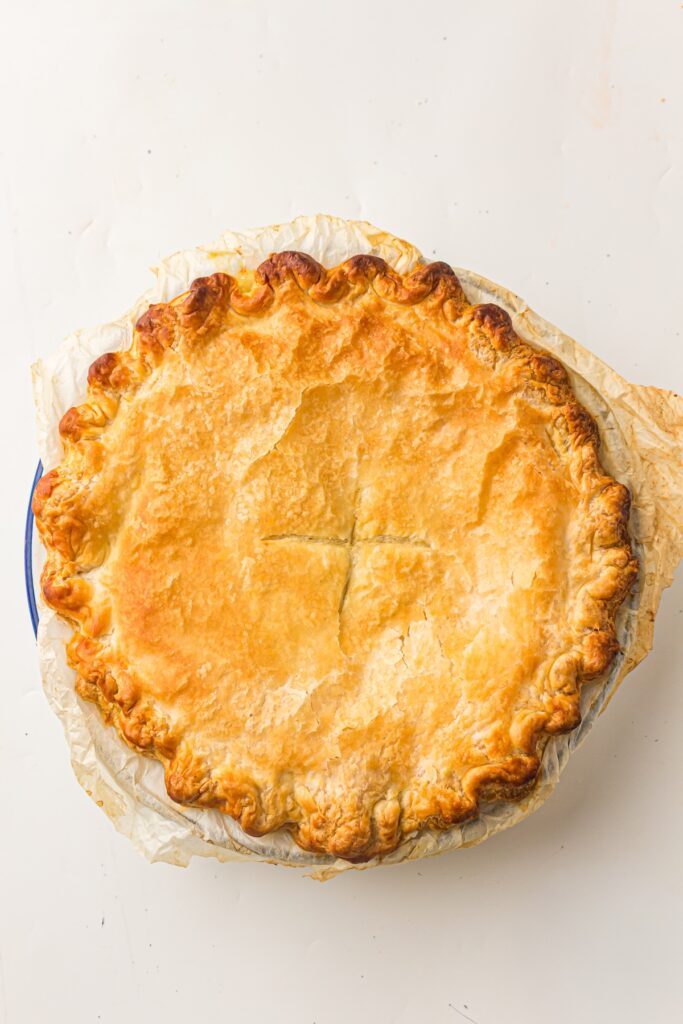
Bake at 400°F for 35 to 40 minutes. Watch for the crust to turn a glorious golden brown.
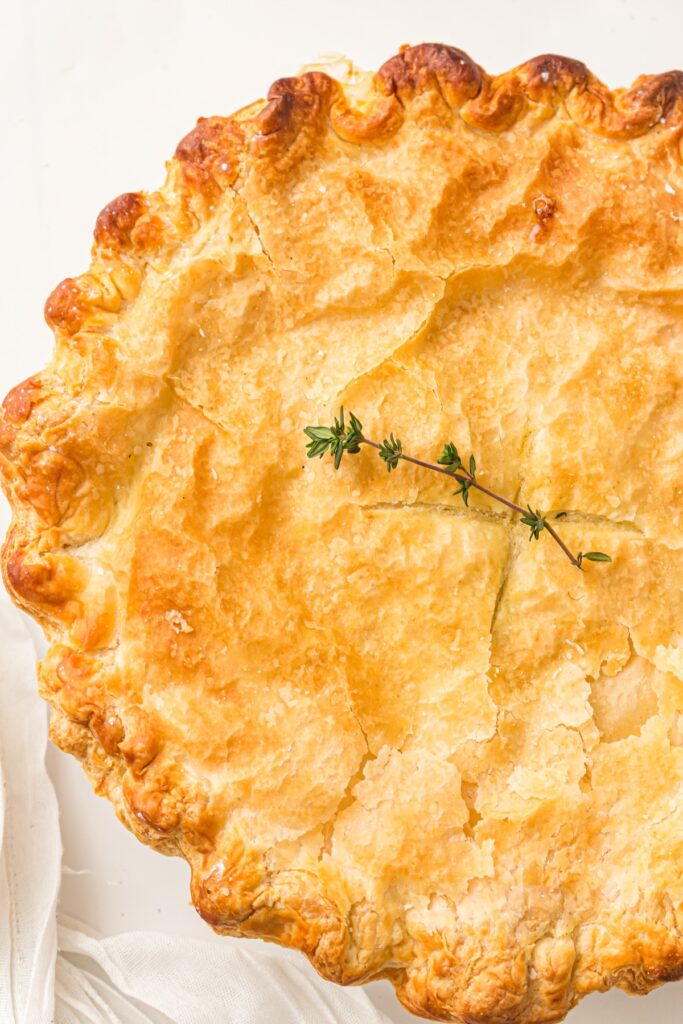
Remove the pie from the oven and allow it to cool fully before slicing. Garnish with a sprig of fresh thyme before serving for a beautiful presentation.
Your Storage and Freezing Guide
Leftover chicken pot pie is a wonderful thing to find in your refrigerator the next day. Here is how to handle your leftovers so they stay delicious:
Refrigerator Storage: Place any leftover slices in an airtight container, or cover your pie dish tightly with foil. It will stay fresh in the fridge for up to 3 days.
Freezing Instructions: You can freeze this pie either baked or unbaked for up to 2 months. If freezing unbaked, assemble the pie completely, wrap it tightly in two layers of plastic wrap, and then add a layer of aluminum foil. Bake it straight from frozen, just adding about 15-20 extra minutes to the baking time.
Reheating Tips: To keep that crust beautifully flaky, skip the microwave. Instead, warm your leftover slices in a 350°F oven for about 15 minutes, or until the filling is heated all the way through.
Frequently Asked Questions
Yes, absolutely! Using a store-bought rotisserie chicken is a brilliant shortcut. It adds wonderful, seasoned flavor and saves you a ton of prep time.
Patience is key here. Cooling allows the gravy to set properly. If you cut into a piping hot pie straight from the oven, the filling will run everywhere. Waiting gives you those gorgeous, clean, neat slices that look professional.
Absolutely. If you love puff pastry, you can easily drape a sheet over the top of the filling instead of using a traditional double pie crust. It yields a lighter, incredibly flaky topping.
You can easily substitute dried rosemary, sage, or a general poultry seasoning blend. Use what you have in your pantry to make the flavor profile work for you.
Time to Get Baking!
There you have it—a foolproof, incredibly satisfying chicken pot pie that will quickly earn a permanent spot in your dinner rotation. It is comforting, packed with flavor, and surprisingly simple to pull together. Plus, the feeling of pulling that golden masterpiece out of the oven is just unbeatable.
Grab some ingredients, preheat that oven, and treat yourself to a dinner that feels like a warm embrace. Once you try this recipe, we would absolutely love to hear how it turned out! Drop a comment below to share your experience, let us know what vegetables you added, or tell us your favorite comfort food sides. Happy baking!

Classic Chicken Pot Pie
Ingredients
For the Filling
- 3 cups cooked chicken diced
- 2 tablespoons butter
- 1 small onion diced
- 2 carrots diced
- 2 celery stalks diced
- ⅓ cup all-purpose flour
- 2 cups chicken broth
- ½ cup whole milk
- 1 teaspoon salt
- ½ teaspoon black pepper
- ½ teaspoon dried thyme
For the Crust
- 2 refrigerated pie crusts
- Fresh thyme optional, for garnish
Instructions
- Preheat your oven to 400°F (200°C) so it is hot and ready for baking.
- Melt the butter in a large skillet over medium heat.
- Sauté the vegetables by adding the diced onion, carrots, and celery to the skillet. Cook them until they soften and smell fragrant, which usually takes about 5 minutes.
- Stir in the flour and cook the mixture for exactly 1 minute. This crucial step cooks out the raw flour taste and helps build a rich base for your gravy.
- Build the sauce by gradually whisking in the chicken broth and whole milk. Keep whisking continuously until the mixture thickens into a smooth, creamy gravy.
- Add the flavor and protein by folding in the diced chicken, salt, black pepper, and dried thyme. Stir everything gently to combine, then remove the skillet from the heat.
- Prepare the bottom crust by unrolling one refrigerated pie crust and pressing it gently into the bottom of a 9-inch pie dish. Transfer your warm filling directly into the lined dish.
- Seal the pie by placing the second pie crust over the filling. Crimp the top and bottom edges together tightly to seal the pastry and keep the gravy inside where it belongs.
- Vent the crust by cutting a few small slits in the top pastry with a sharp knife. This allows steam to escape so your crust stays beautifully crisp.
- Bake the pie at 400°F for 35 to 40 minutes, or until the crust turns a glorious golden brown.
- Cool before serving. Allow the pie to rest and cool fully before slicing. We know it smells amazing, but giving it time to set ensures you get neat, clean slices instead of a runny filling.
- Garnish with a sprinkle of fresh thyme just before bringing it to the table.
Notes
- Refrigerator: Store any leftover pie tightly covered with foil or in an airtight container for up to 3 days.
- Freezer: You can freeze this pie baked or unbaked for up to 2 months. Wrap it securely in plastic wrap and aluminum foil to prevent freezer burn.
- Reheat: Warm your leftovers in a 350°F oven until heated all the way through. Skipping the microwave keeps that wonderful crust nice and flaky.