We all have those moments when a sudden craving for something sweet hits hard. You want chocolate. You want caramel. But you definitely do not want to spend an hour measuring refined sugars, turning on a hot oven, and creating a massive pile of dishes. I have been there more times than I can count, and that exact dilemma led me to this absolute lifesaver of a dessert.
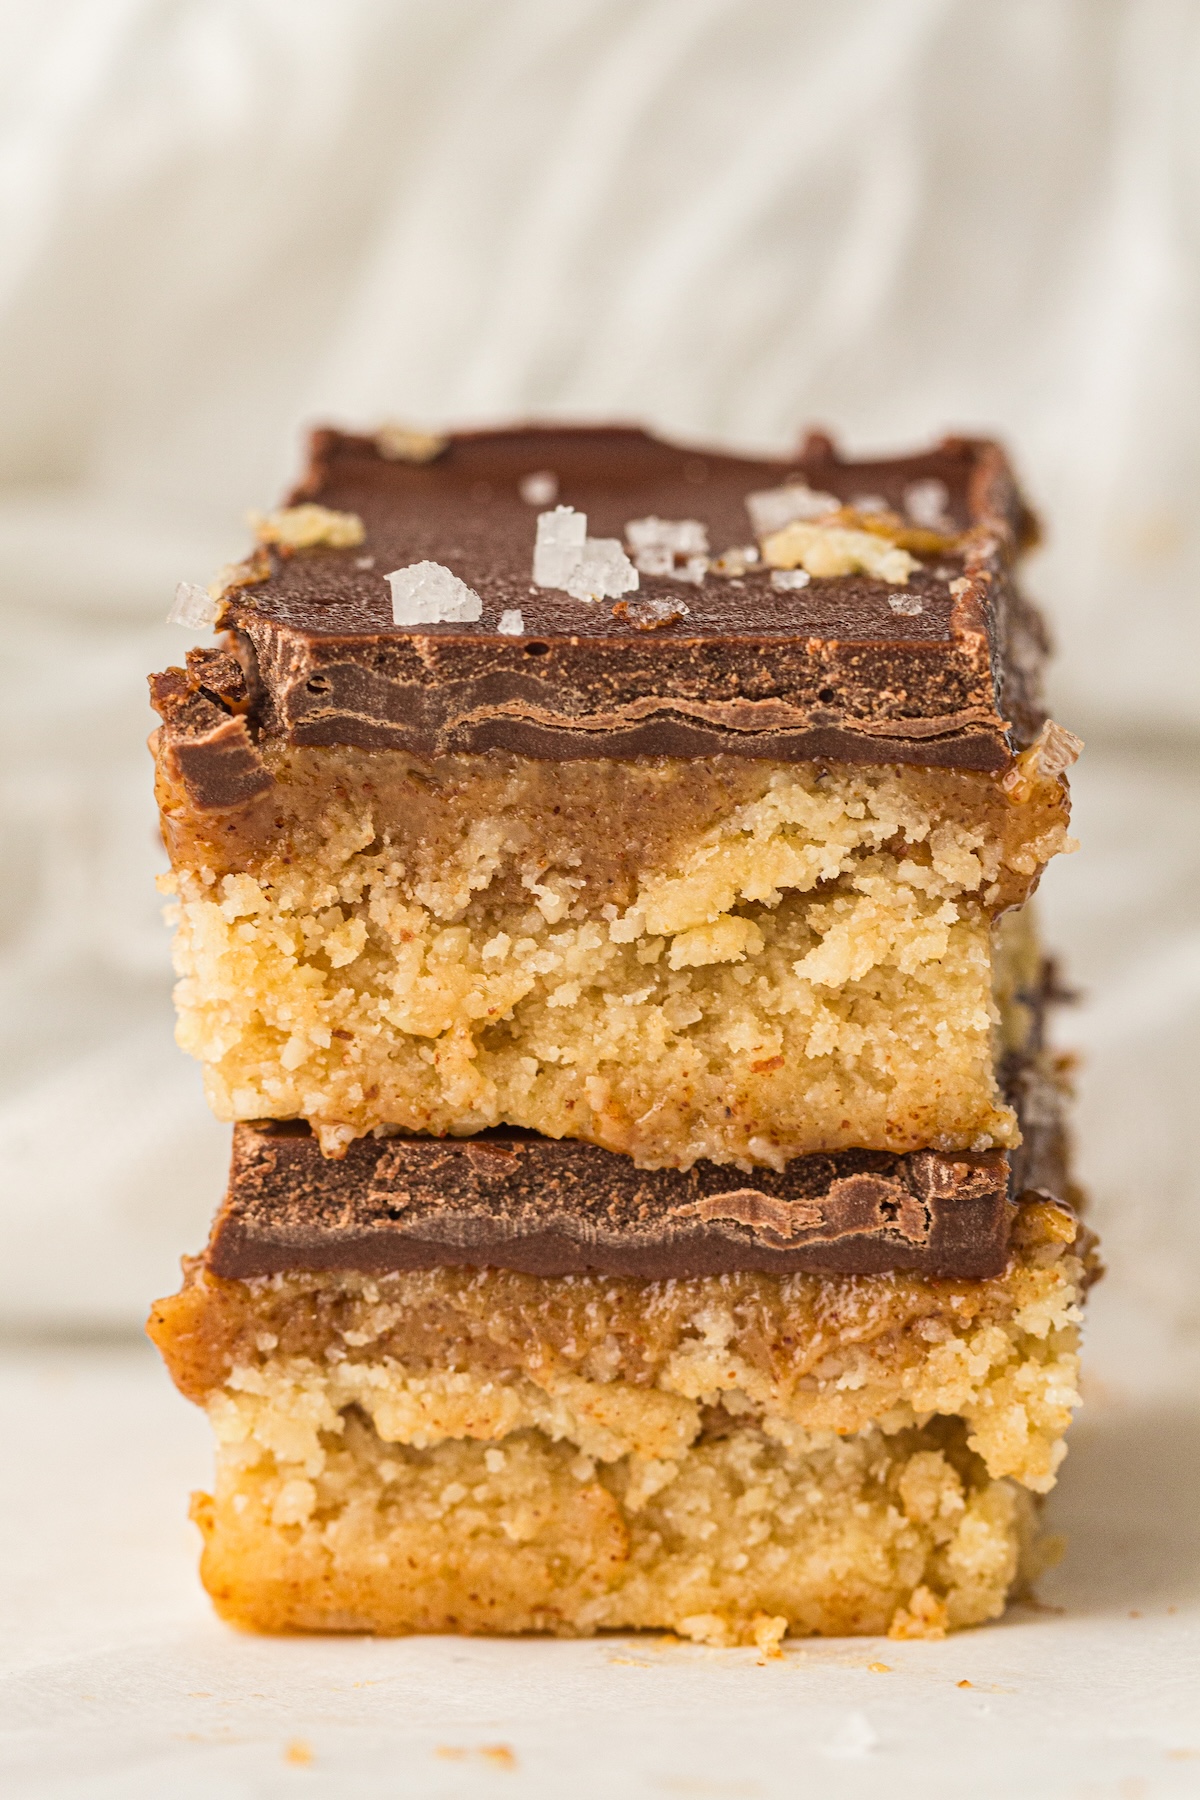
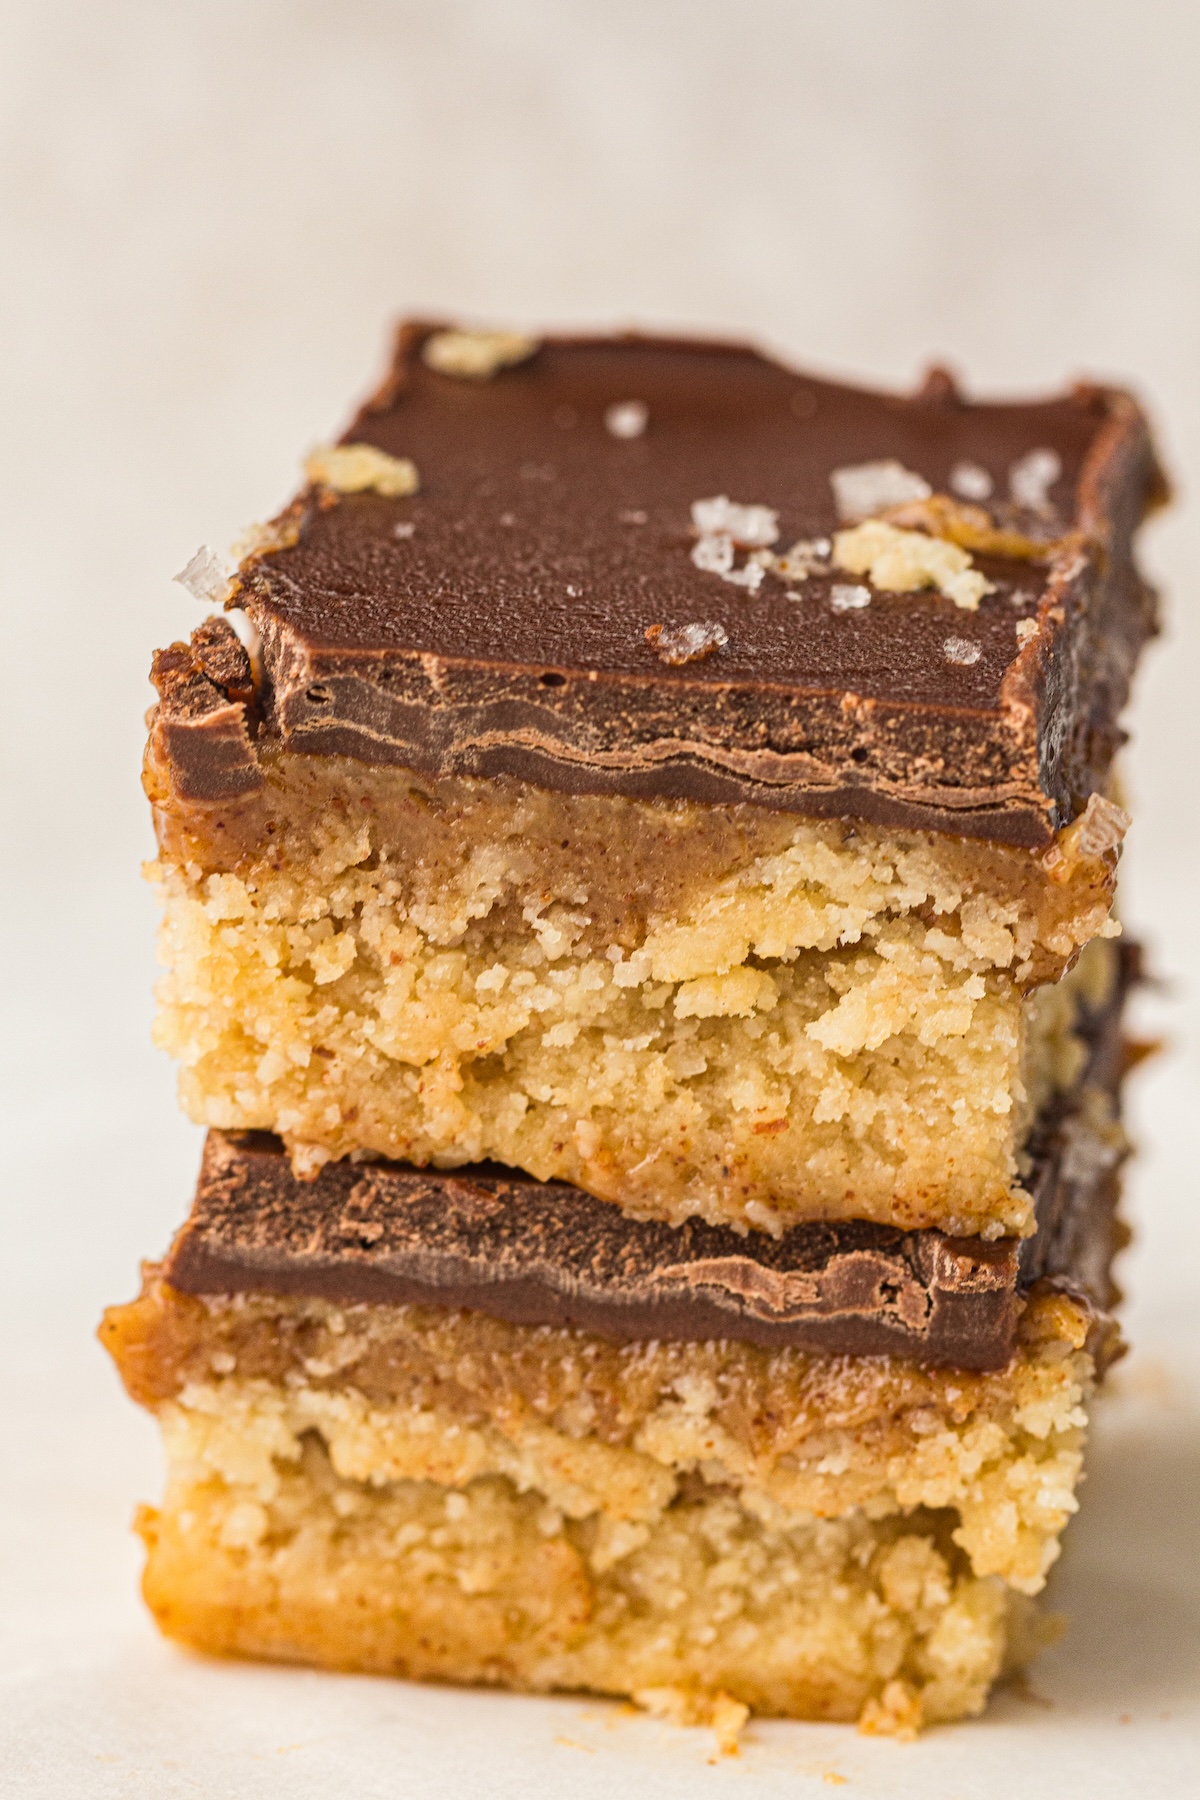
These healthy no-bake chocolate caramel bars give you everything you want in a decadent dessert, without the hassle or the sugar crash. We are talking about a perfectly chewy almond flour base, a rich and gooey almond butter caramel center, and a thick layer of dark chocolate on top. They taste like an expensive candy bar, but you can whip them up right in your own kitchen with minimal effort.
In this post, we will cover exactly why these bars are about to become your new favorite dessert, break down the simple ingredients you need, and walk through the foolproof steps to make them.
Why You Will Love This Recipe
Finding a dessert that satisfies a serious sweet tooth while actually providing some nutritional value feels like finding a unicorn. But these bars deliver on all fronts.
First, there is absolutely zero baking required. Whether it is the middle of summer and you refuse to turn on your oven, or you just want a low-effort treat, these bars come together completely in the fridge and microwave.
Second, they solve the classic snacking problem. Instead of reaching for a store-bought candy bar packed with artificial ingredients and high-fructose corn syrup, you can grab one of these. They rely on wholesome ingredients that provide lasting energy, meaning you will feel satisfied after eating just one.
Finally, they are incredibly easy to make. You do not need any special equipment or advanced pastry skills. If you can stir ingredients in a bowl and melt chocolate, you can make these bars perfectly on your first try.
What Makes These Bars Healthier?
You might be wondering how a chocolate caramel bar can actually qualify as healthy. The secret lies in clever ingredient swaps that trade empty calories for healthy fats, protein, and natural sweeteners.
Natural Sweeteners
Instead of relying on processed white sugar, this recipe uses pure maple syrup. Maple syrup adds a wonderful depth of flavor and a slight earthiness that pairs perfectly with the almond butter to create a rich caramel taste.
Better Fats and Proteins
We skip the heavy cream and butter typically found in caramel. Instead, creamy almond butter steps up to the plate. It provides a luxurious texture while packing in protein and heart-healthy fats. The base uses almond flour rather than refined white flour, keeping the recipe naturally gluten-free and giving it a wonderful, cookie-dough-like texture.
Dark Chocolate
Using dark chocolate for the topping not only balances the sweetness of the caramel layer but also brings a solid dose of antioxidants to your dessert. A little coconut oil mixed in ensures the chocolate sets nicely but still melts perfectly when you take a bite.
Ingredients for No-Bake Caramel Bars
Gather these simple, wholesome ingredients to build your bars layer by layer.
The Base Layer
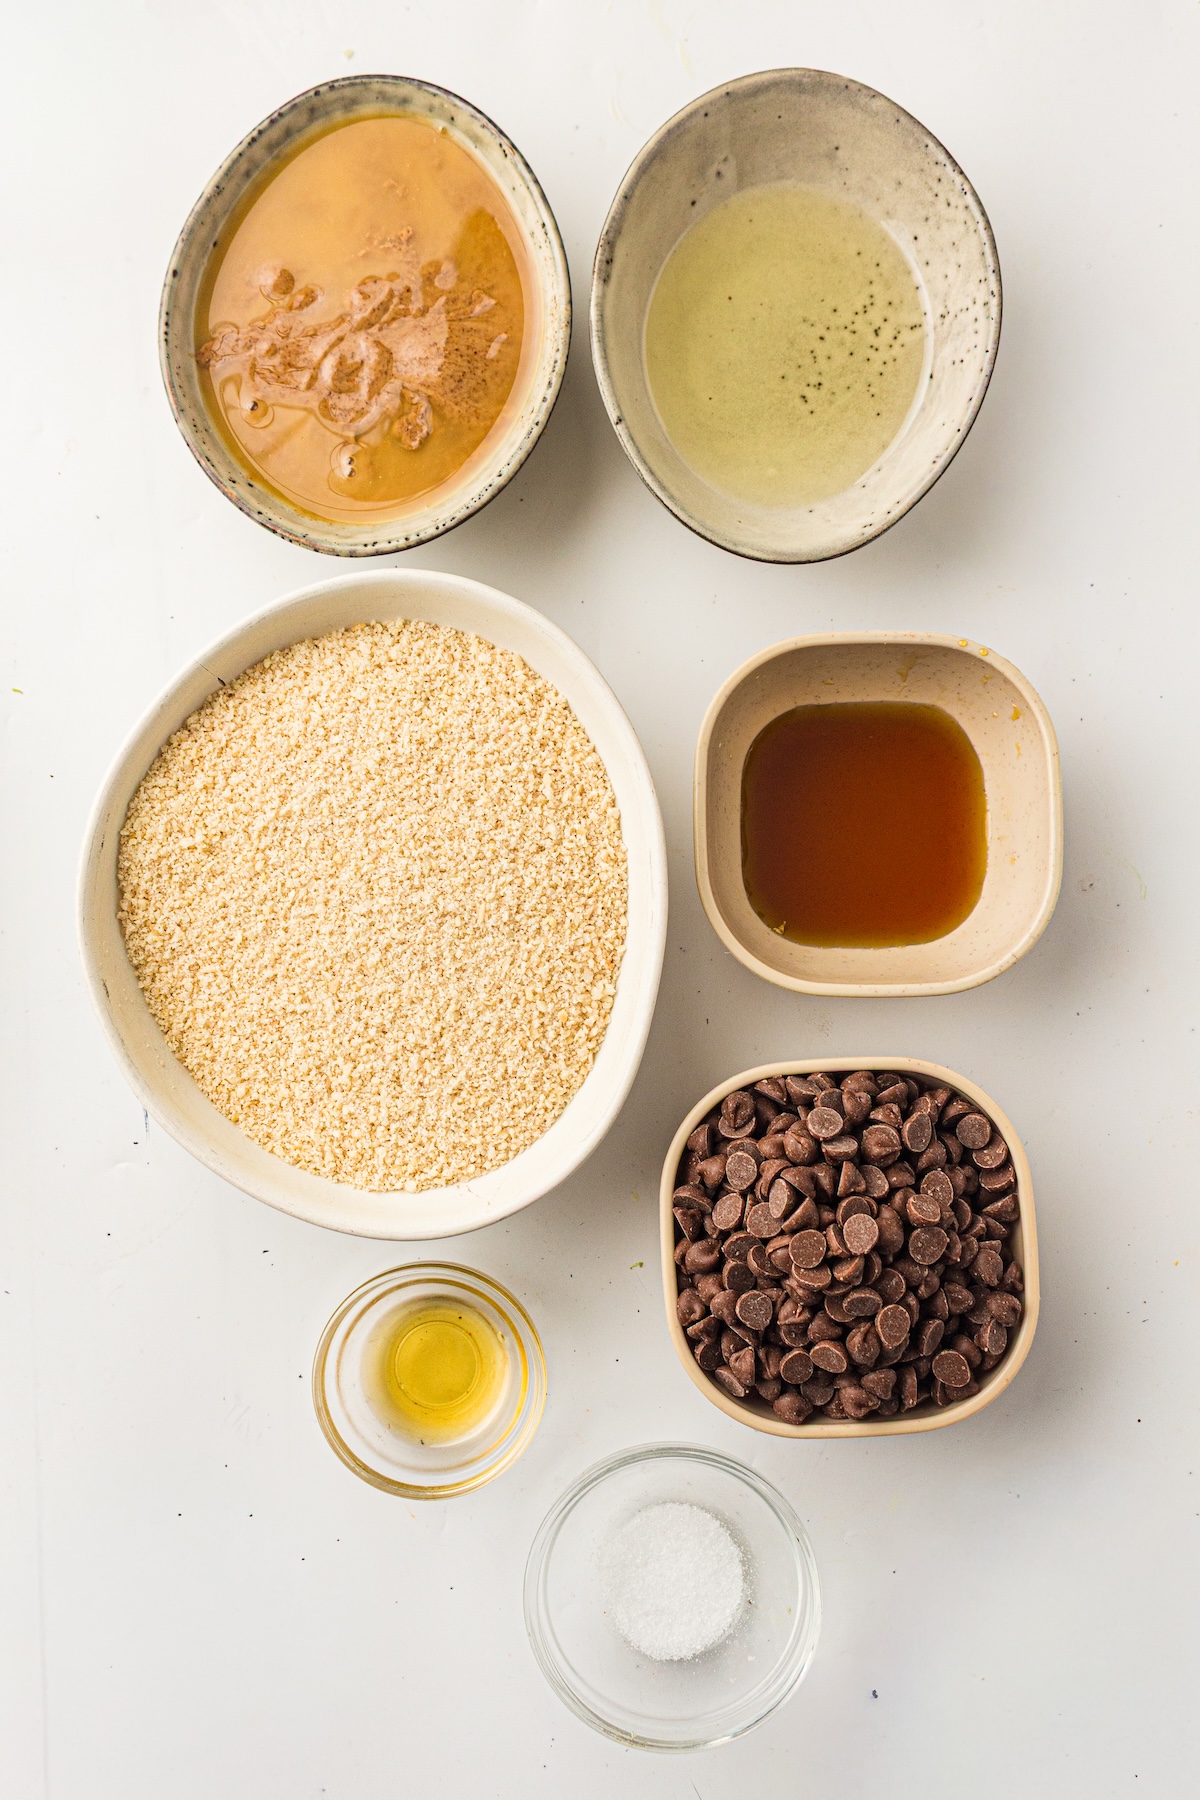
- 1½ cups almond flour (150 g): This creates a soft, chewy crust.
- 2 tablespoons coconut oil, melted (28 g): Helps bind the base together.
- 2 tablespoons maple syrup (30 ml): Adds just the right amount of sweetness.
- ½ teaspoon vanilla extract (2.5 ml): Enhances all the flavors.
- ¼ teaspoon salt (1.5 g): Essential for balancing the sweetness.
The Caramel Layer
- ½ cup creamy almond butter (120 g): Look for natural almond butter where the only ingredient is almonds.
- 3 tablespoons maple syrup (45 ml): Creates that sticky, sweet caramel consistency.
- 2 tablespoons coconut oil, melted (28 g): Helps the caramel set up in the fridge.
- ¼ teaspoon salt (1.5 g): Turns this into a salted caramel dream.
The Chocolate Topping
- 1 cup dark chocolate chips (170 g): Choose your favorite brand of high-quality dark chocolate.
- 1 teaspoon coconut oil (5 g): Makes the chocolate easier to slice without cracking.
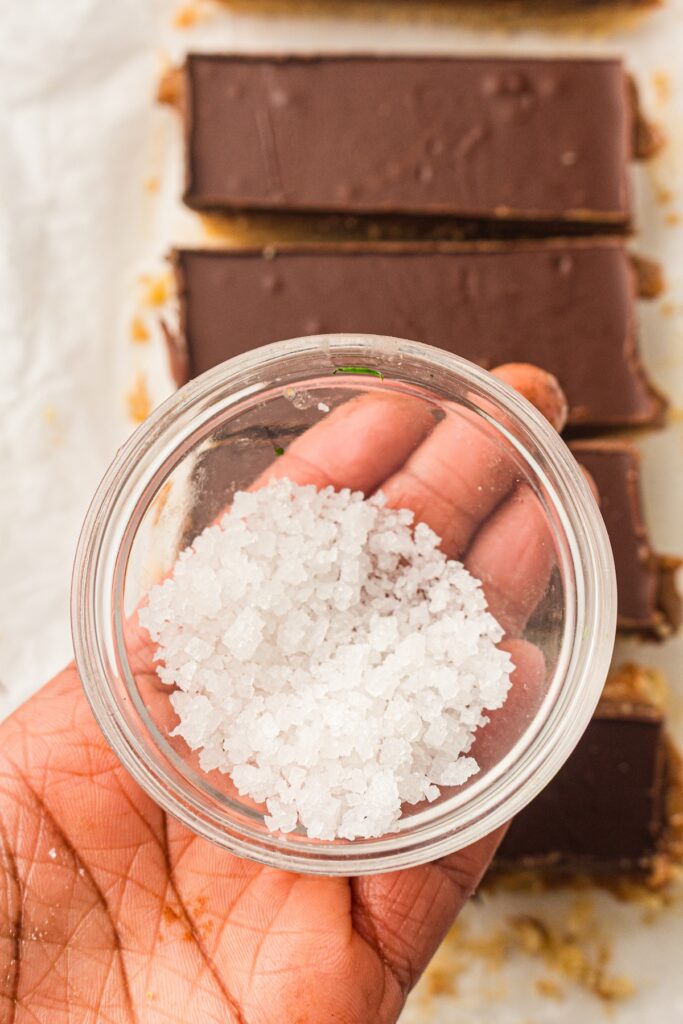
- Flaky sea salt (optional): A sprinkle on top makes these look and taste gourmet.
Step-by-Step Instructions
Ready to make some magic? Follow these simple steps to layer your bars.
1. Prep Your Pan
Start by lining an 8×8-inch (20×20 cm) baking pan with parchment paper. Leave a little extra paper hanging over the edges. This creates a “sling” that makes it incredibly easy to lift the bars out of the pan later for clean slicing.
2. Mix and Press the Base
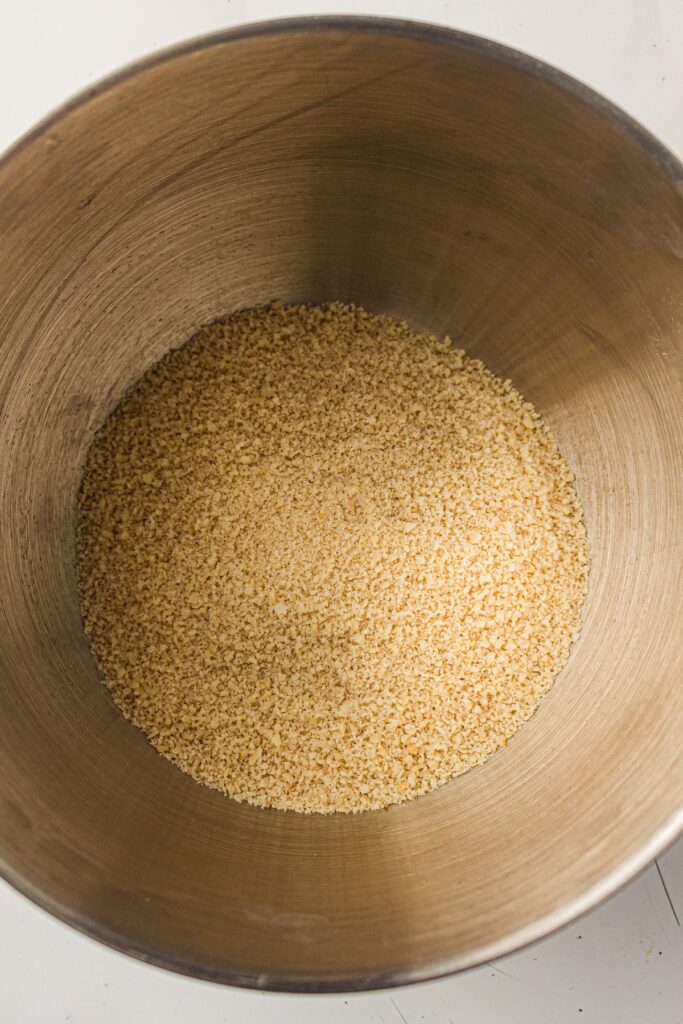
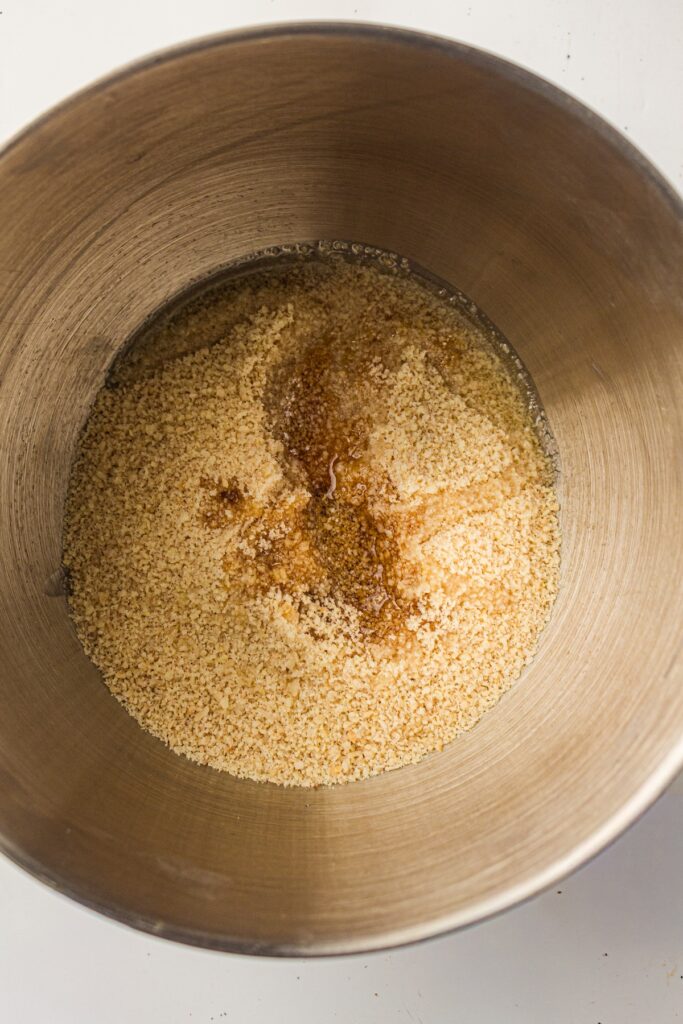
In a medium bowl, combine your almond flour, melted coconut oil, maple syrup, vanilla extract, and salt. Stir everything together until a soft dough forms. It should feel a bit like wet sand.
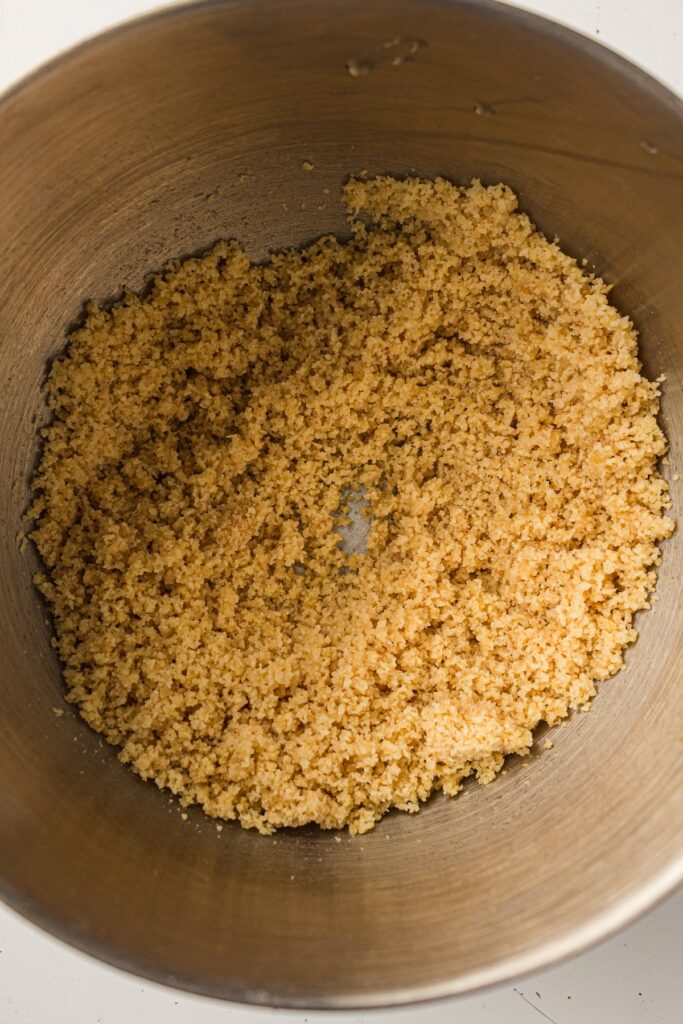
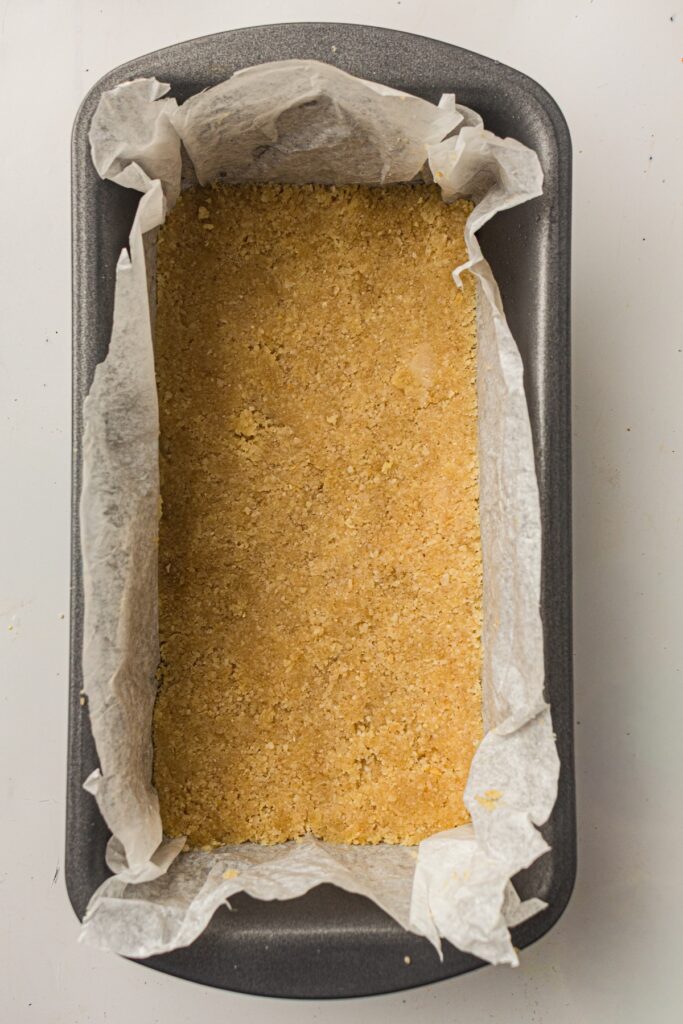
Pour this mixture into your prepared pan and press it down firmly and evenly. Pop the pan into the refrigerator for 20 minutes so the base can chill and firm up.
3. Create the Caramel Layer
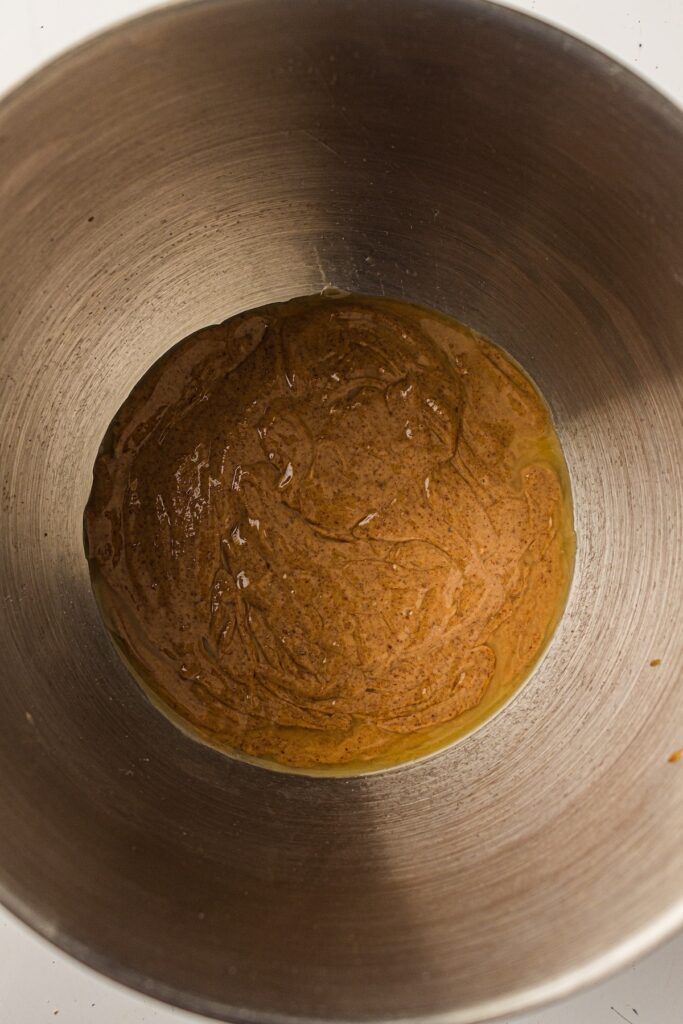
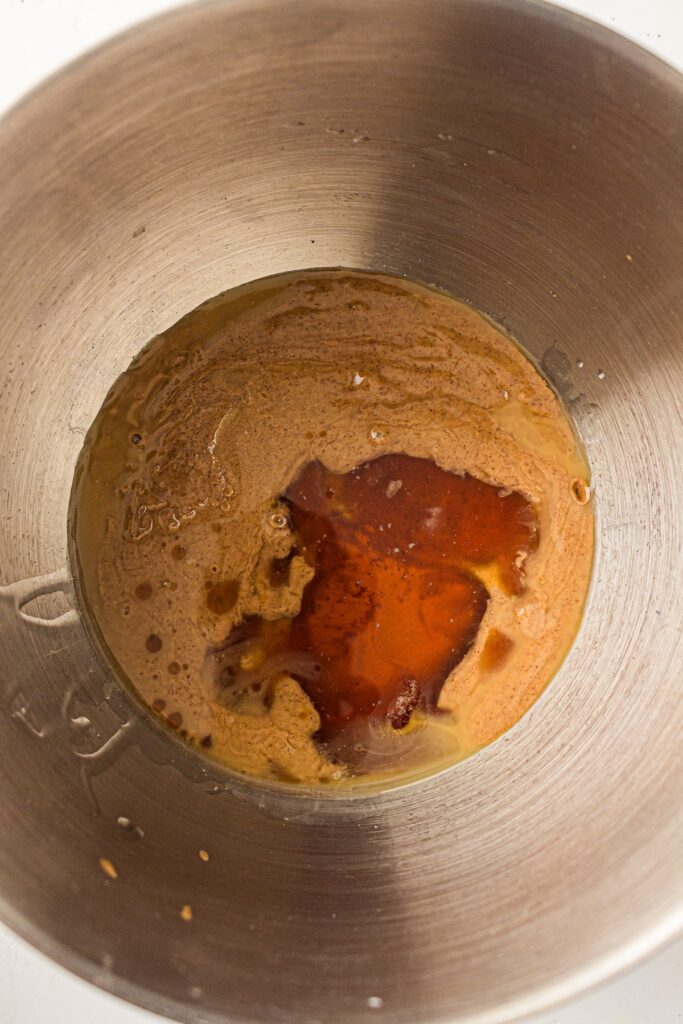
While your base chills, grab a separate bowl. Stir together the creamy almond butter, maple syrup, melted coconut oil, and salt. Keep stirring until the mixture is completely smooth and glossy.
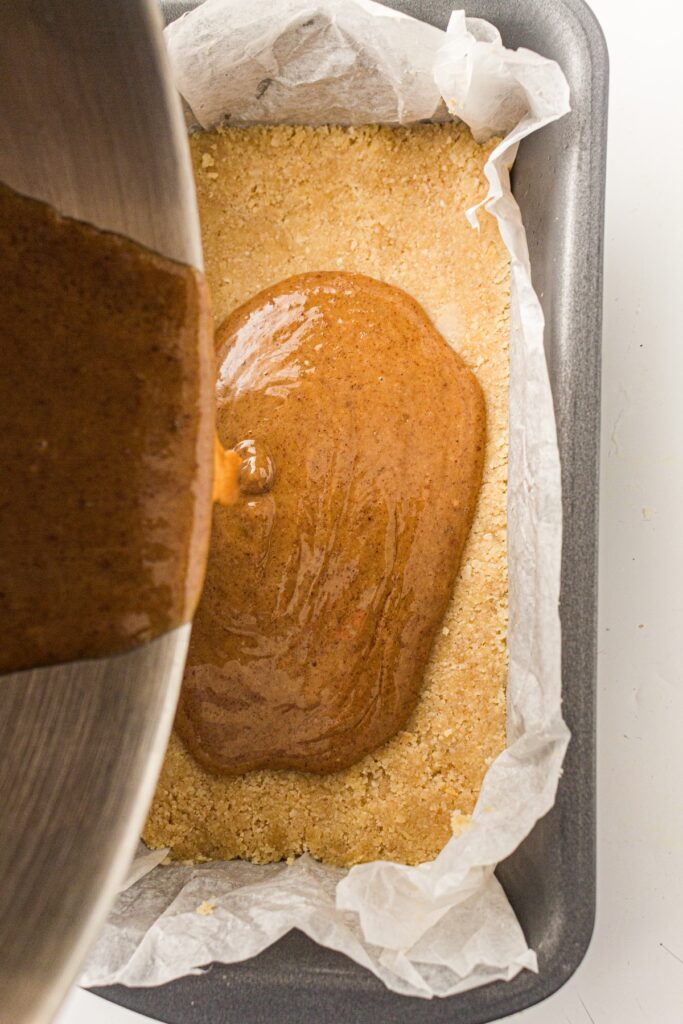
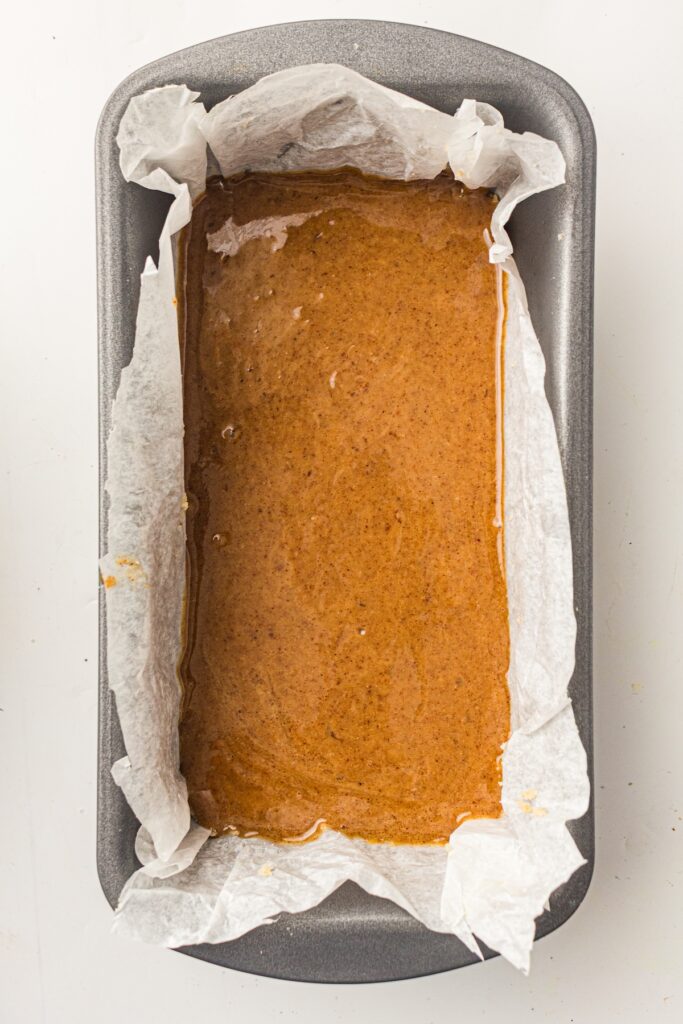
Take your chilled base out of the fridge, pour this caramel mixture right over the top, and spread it out evenly with a spatula. Put the pan back into the refrigerator for 30 to 40 minutes until the caramel feels set to the touch.
4. Add the Chocolate Topping

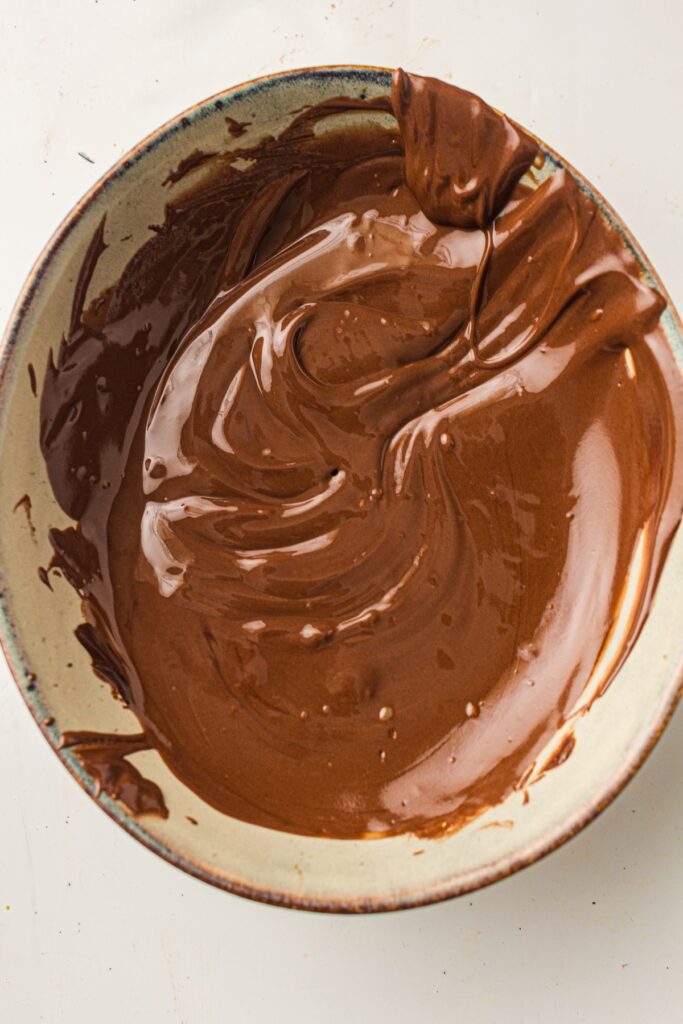
Place your dark chocolate chips and coconut oil into a microwave-safe bowl. Heat this in the microwave in 20-second intervals. Make sure you take it out and stir it between each interval. This prevents the chocolate from burning.
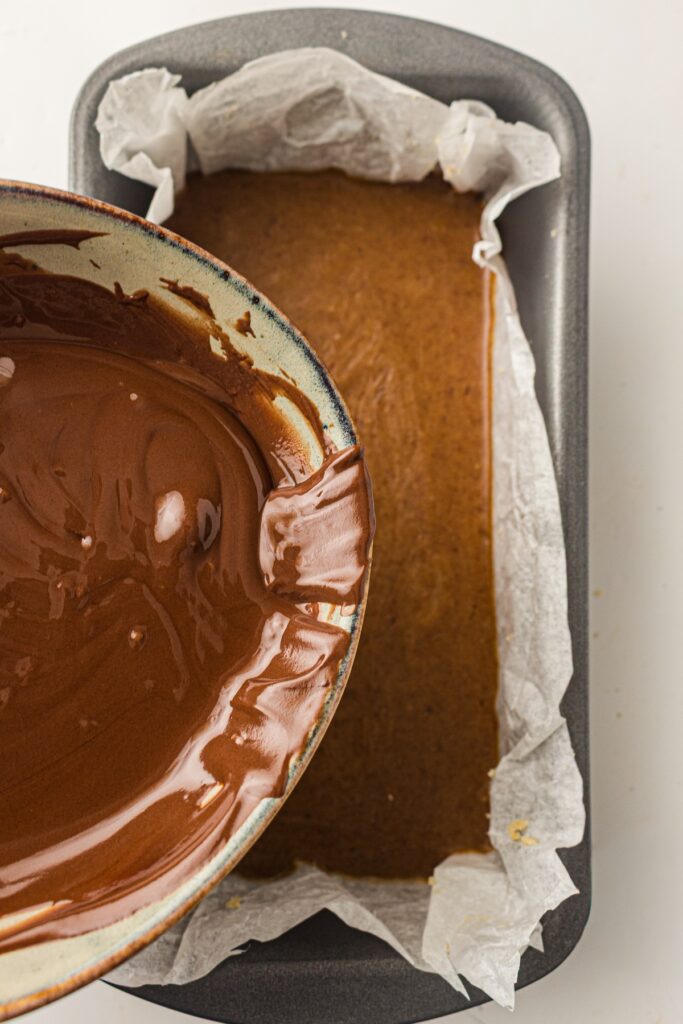
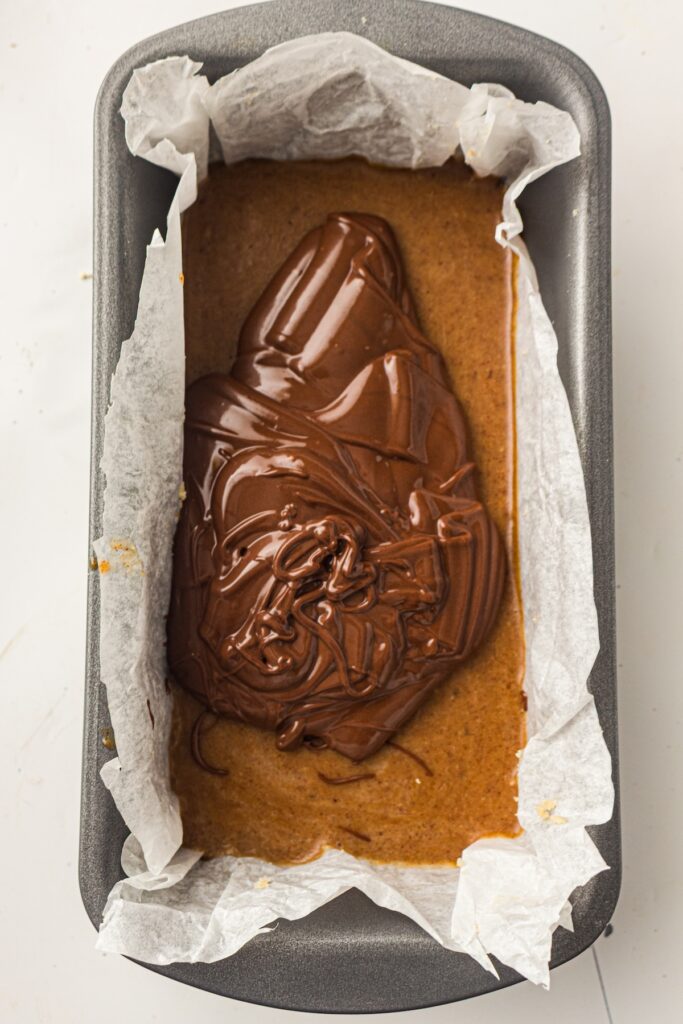
Once it is completely smooth and melted, pour it over your set caramel layer. Spread it all the way to the edges. If you love a salty-sweet combo, sprinkle some flaky sea salt over the top right now before the chocolate hardens.
5. Chill and Slice

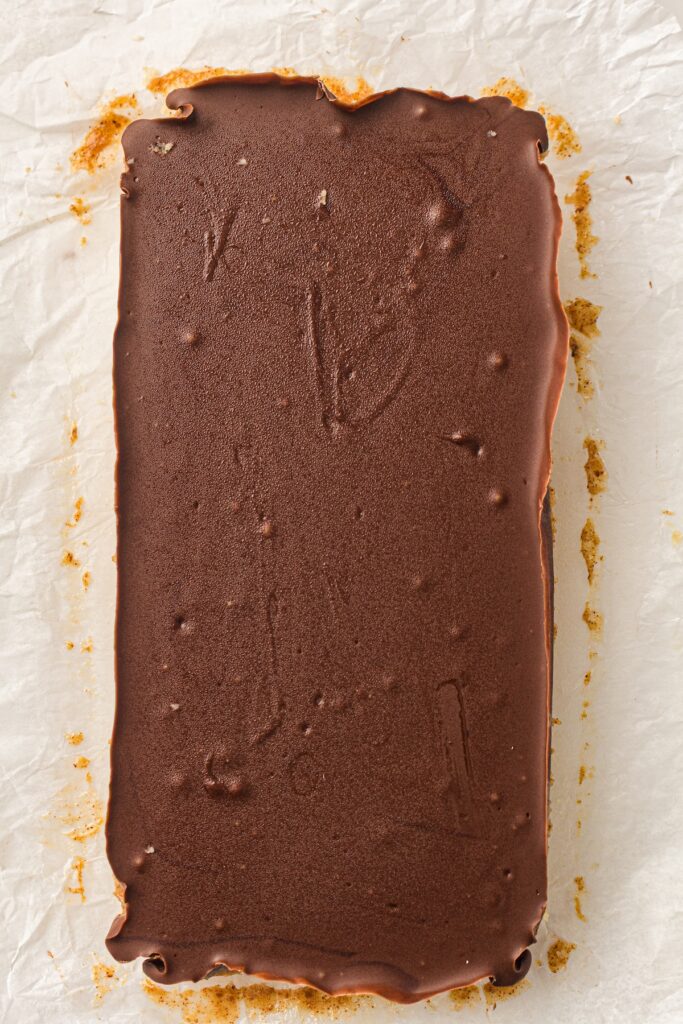
Place the pan into the refrigerator for at least one hour until the chocolate is completely fully set. When you are ready to serve, use the parchment paper sling to lift the entire block out of the pan.
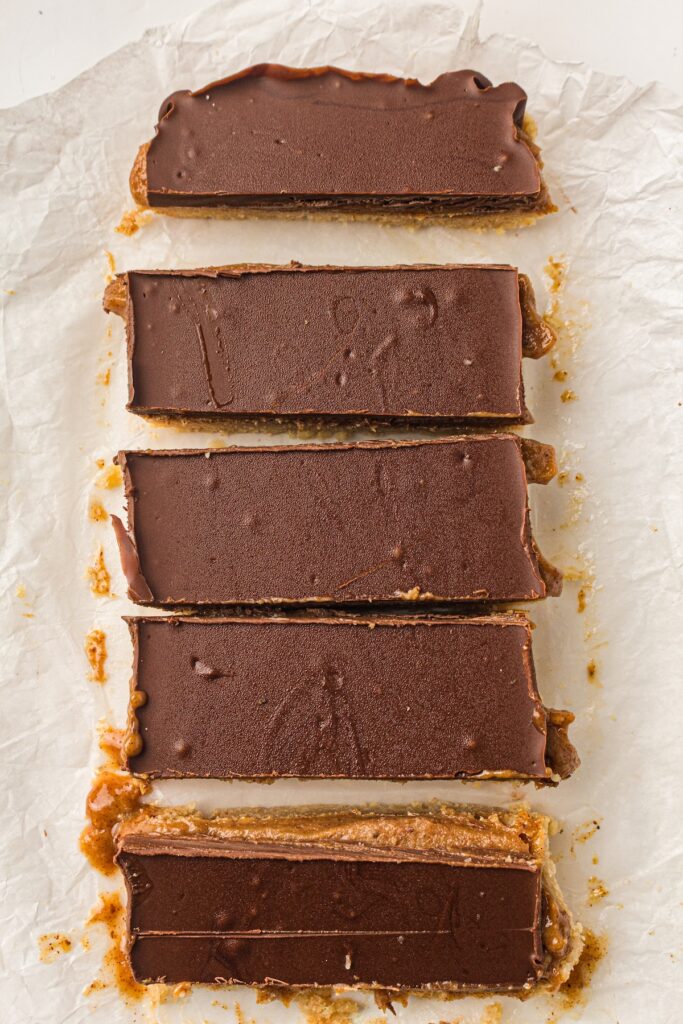
Place it on a cutting board and use a sharp knife to slice it into 12 squares or bars.
Expert Tips for the Best Results
Want to make sure your bars come out looking like they belong in a bakery display case? Run your sharp knife under hot water for a few seconds, then wipe it completely dry before making your cuts. The warm blade will melt right through the hard chocolate layer without cracking it, giving you those beautiful, clean edges.
Also, make sure your almond butter is at room temperature and well-stirred before you try to mix your caramel layer. If you use cold, stiff almond butter straight from the fridge, it will be much harder to achieve that silky smooth caramel texture.
Storage and Freezing Instructions

Because these bars contain coconut oil, which softens at room temperature, you absolutely need to keep them chilled.
Refrigerator Storage: Store your sliced bars in an airtight container in the refrigerator. They will stay fresh and delicious for up to one week. They honestly taste best right out of the fridge when they are cold and crisp.
Freezer Storage: If you want to make a batch to keep on hand for future cravings, these freeze beautifully. Place the sliced bars in a freezer-safe bag or container, separating layers with parchment paper so they do not stick together. You can freeze them for up to two months. Just let them sit at room temperature for about five minutes before eating so you do not hurt your teeth!
Frequently Asked Questions
Yes! Peanut butter works incredibly well in this recipe. Swapping the almond butter for creamy peanut butter gives the bars a more classic candy flavor, highly reminiscent of a healthier peanut butter cup.
Yes, these bars are incredibly easy to make completely dairy-free. The base and caramel layers are naturally dairy-free already. Just make sure you double-check the label on your dark chocolate chips to ensure they do not contain any milk fat or dairy ingredients.
While maple syrup provides the best flavor for the “caramel” layer, you can substitute agave nectar or honey if that is what you have in your pantry. Just keep in mind that honey will significantly change the flavor profile and make the bars taste less like traditional caramel.
Now it is your turn to head into the kitchen and whip up a batch of these incredible no-bake treats. Your future self will thank you when that three o’clock afternoon craving hits and you have a healthy, decadent chocolate caramel bar waiting for you in the fridge!
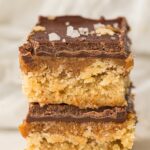
Healthy No-Bake Chocolate Caramel Bars
Ingredients
Base Layer
- 1½ cups 150 g almond flour
- 2 tablespoons 28 g coconut oil, melted
- 2 tablespoons 30 ml maple syrup
- ½ teaspoon 2.5 ml vanilla extract
- ¼ teaspoon 1.5 g salt
Caramel Layer
- ½ cup 120 g creamy almond butter
- 3 tablespoons 45 ml maple syrup
- 2 tablespoons 28 g coconut oil, melted
- ¼ teaspoon 1.5 g salt
Chocolate Topping
- 1 cup 170 g dark chocolate chips
- 1 teaspoon 5 g coconut oil
- Flaky sea salt for topping (optional)
Instructions
- Line an 8×8-inch (20×20 cm) baking pan with parchment paper, leaving a bit of overhang on the edges so you can easily pull the bars out later.
- Mix the almond flour, melted coconut oil, maple syrup, vanilla extract, and salt in a medium bowl until a soft dough forms.
- Press the dough mixture evenly into the bottom of the prepared pan. Chill in the refrigerator for 20 minutes until the base feels firm.
- Stir the creamy almond butter, maple syrup, melted coconut oil, and salt together in a separate bowl until the mixture is completely smooth and glossy.
- Spread the caramel layer evenly over the chilled base. Place the pan back in the refrigerator for 30 to 40 minutes until the caramel sets.
- Place the dark chocolate chips and coconut oil in a microwave-safe bowl. Heat in the microwave in 20-second intervals, stirring well between each interval, until the chocolate melts smoothly.
- Pour the melted chocolate over the set caramel layer and spread it out evenly to the edges. Sprinkle the top with flaky sea salt if you like a sweet and salty combination.
- Refrigerate the pan for at least 1 hour until the chocolate hardens completely.
- Lift the parchment paper to remove the block from the pan. Slice into 12 bars or squares using a sharp knife.